In the world of gaming, the hardware you use can significantly impact your experience. Whether you’re diving into the immersive landscapes of open-world adventures or engaging in intense multiplayer battles, having a powerful gaming PC can make all the difference. While pre-built gaming systems offer convenience, there’s something truly special about crafting your own custom gaming rig. In this blog, we’ll explore the exhilarating journey of building and owning a gaming PC, from selecting the right components to assembling and optimizing your system for peak performance.
Key Takeaways
- Custom-building a gaming PC allows for a personalized experience, ensuring that each component meets your specific gaming needs and preferences.
- Involving family, especially children, in the PC building process can provide educational value and foster important skills like teamwork and problem-solving.
- Choosing the right components involves balancing performance with budget, and considering factors such as compatibility and future-proofing.
- The assembly of a gaming PC is a step-by-step process that requires careful planning, the right tools, and a dedicated workspace.
- Post-assembly, optimizing your PC’s performance through BIOS tuning, overclocking, and regular updates can enhance your gaming experience.
Understanding PC Components
The Heart of the Machine: CPU and GPU Essentials
At the core of every custom PC lies the dynamic duo of computing: the Central Processing Unit (CPU) and the Graphics Processing Unit (GPU). The CPU, often referred to as the brain of the computer, handles general tasks and complex calculations, while the GPU accelerates graphic rendering, crucial for a visually stunning gaming experience.
When selecting a CPU, consider the number of cores and clock speed, as these factors directly impact your system’s multitasking abilities and overall speed. For gamers and power users, a higher core count and the option to overclock can significantly boost performance.
The GPU not only defines the quality of graphics but also influences frame rates and resolution. With technologies like ray tracing and DLSS, modern GPUs push the boundaries of realism and performance in gaming.
It’s essential to balance your choice of CPU and GPU to avoid bottlenecks where one component limits the performance of the other. Here’s a quick checklist to guide your selection:
- Evaluate CPU and GPU options from leading manufacturers like Intel and AMD.
- Assess the core count and clock speeds of potential CPUs.
- Look for GPUs with sufficient VRAM and support for advanced features like ray tracing.
- Consider the thermal design power (TDP) to ensure your cooling system can handle the heat output.
Memory and Storage: Balancing Speed and Capacity
When it comes to memory (RAM), it’s not just about having a lot; it’s about having the right balance. RAM is the cornerstone of multitasking and quick data access for the CPU. For gamers, having enough RAM with the appropriate speed is essential to handle modern games and maintain seamless performance.
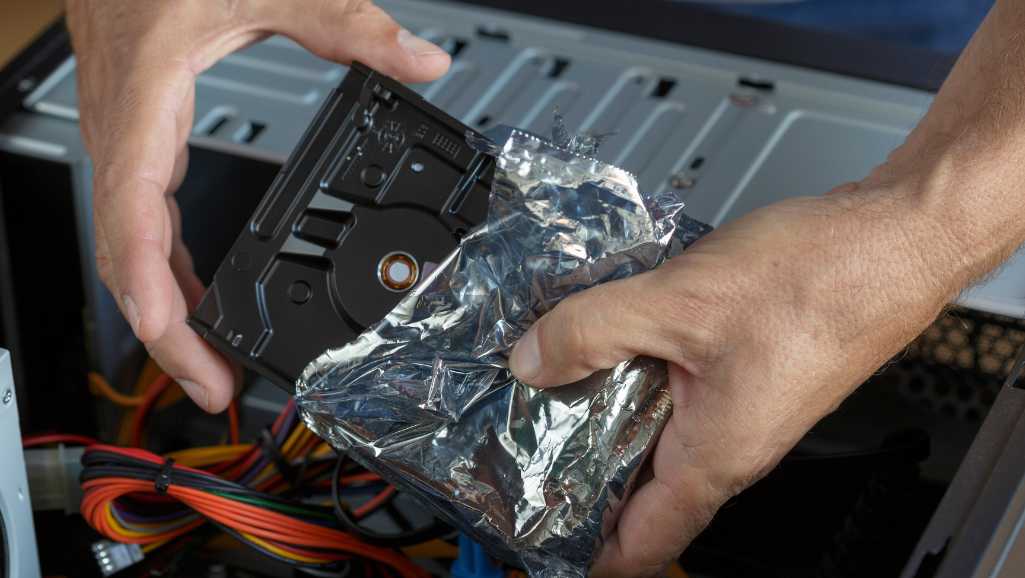
In the realm of storage, the choice between SSDs and HDDs can significantly affect your system’s responsiveness. SSDs, especially NVMe types, offer rapid load times and contribute to a smoother gaming experience. However, they tend to be more expensive per gigabyte than HDDs, which still provide ample storage at a lower cost. Balancing your storage options often means using an SSD for your operating system and most-played games, while relegating larger files and less frequently accessed data to a more cost-effective HDD.
Pro Tip: Always aim for an SSD for your system drive to ensure quick boot times and game loading speeds. For additional storage, consider the price per gigabyte and your personal storage needs when choosing between an SSD and HDD.
Here’s a quick comparison to help you decide:
| Storage Type | Speed | Capacity | Cost-Effectiveness |
|---|---|---|---|
| SSD (NVMe) | Fast | Lower | High |
| SSD (SATA) | Moderate | Higher | Moderate |
| HDD | Slow | Highest | Best |
Remember, the goal is to strike a perfect balance between speed and capacity without breaking the bank.
Motherboards and Power Supplies: The Framework of Stability
When building your custom PC, the motherboard is the central hub that connects all the components. It’s crucial to select one that not only fits your current needs but also allows for future expansions. Choosing a reliable PSU that complements your CPU choice is equally important, as it guarantees a strong foundation for power delivery.
- Efficiency Ratings: Look for 80 PLUS certification, indicating energy efficiency.
- Wattage: Calculate your system’s power needs and add a buffer for upgrades.
- Connectivity: Ensure enough connectors for all your components.
Remember, a stable power delivery is key for optimal performance and longevity of your gaming PC.
The right combination of motherboard and PSU will provide a seamless gaming experience and safeguard your investment. It’s not just about the power; it’s about the right power. Make sure to review the latest recommendations, such as the ‘Best Motherboards 2024 for Gaming‘, to stay informed on the best options available.
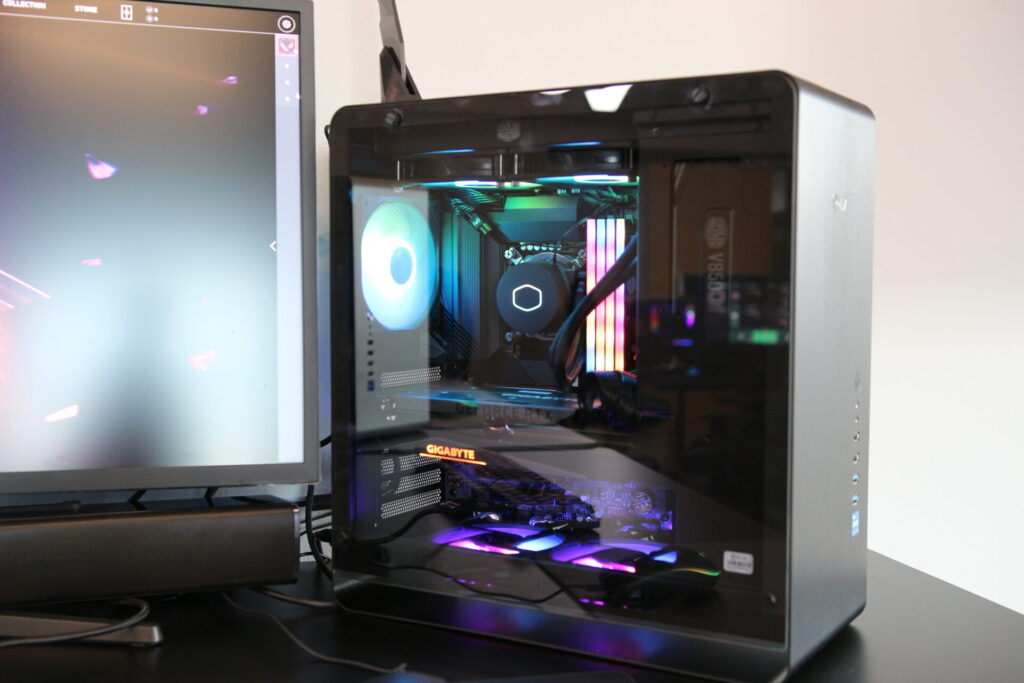
Cooling Systems: Keeping Your Rig Running Smoothly

Adequate cooling is paramount in maintaining optimal performance and extending the lifespan of your PC components. Efficient cooling is essential to maintain optimal temperatures within the gaming PC, especially during intensive gaming sessions. Selecting a reliable CPU cooler, case fans, and adequate airflow management is crucial for preventing thermal issues and maintaining system stability.
In the realm of PC gaming, heat is the enemy of performance. Mastering the cooling arts—whether through adequate airflow, strategic fan placement, or advanced liquid cooling solutions—ensures your system remains cool under the fiercest of battles, preserving longevity and stability.
Maintaining a streamlined airflow can prevent the buildup of hot spots within the case, which are detrimental to both performance and hardware integrity.
The choice between air and liquid cooling systems often comes down to personal preference, noise tolerance, and specific PC requirements. Here’s a quick comparison to help you decide:
- Air Cooling: Generally more affordable and easier to install. Ideal for moderate gaming setups.
- Liquid Cooling: Offers superior cooling performance. Best suited for high-end, overclocked systems.
When setting up your cooling solutions, ensure they are strategically placed within the case to maximize airflow and cooling efficiency. Connect them to the motherboard or PSU as required, and consider the following highlights from a recent roundup of the best CPU coolers:
- Lian Li Galahad II Performance 360
- Arctic Liquid Freezer II 360 ARGB
- Silverstone IceMyst 360
- Corsair iCUE H170i Elite LCD XT
Peripheral Connections: Monitors, Keyboards, and More
When it comes to enhancing your gaming experience, the role of peripherals is pivotal. High-quality monitors, keyboards, and other devices can transform your gameplay from good to great. Connectivity options like HDMI, DisplayPort, and USB-C are essential for setting up your monitors, especially if you’re aiming for a multi-monitor configuration that can offer an immersive experience.
Mechanical keyboards and precision mice are the keystones of gaming input. Products like the Razer BlackWidow Elite or the Logitech G Pro X Superlight provide the tactile feedback and quick response necessary for competitive gaming. Here’s a quick rundown of peripheral categories to consider:
- Monitors: Look for high refresh rates and low response times.
- Keyboards: Mechanical switches offer durability and better feedback.
- Mice: High DPI and customizable buttons can improve accuracy.
- Audio: A good headset or speakers can greatly enhance immersion.
Remember, the peripherals you choose should complement your gaming rig and play style, ensuring a seamless and enjoyable gaming experience.
While the core components of your PC are crucial, peripherals bring your gaming setup to life, allowing you to interact with your games in a more engaging way. Make sure to invest in peripherals that not only match the performance of your PC but also suit your personal preferences and ergonomic needs.
Choosing the Right Parts for Your Custom Gaming PC
Compatibility and Future-Proofing Your Build
When embarking on the journey of custom PC building, ensuring compatibility among components is paramount. This not only guarantees that your system will function smoothly but also lays the groundwork for future upgrades. A forward-thinking approach involves selecting parts that adhere to the latest standards, such as PCIe 4.0 and USB 3.1, which can accommodate next-generation hardware.
Future-proofing your rig goes beyond current performance; it’s about anticipating the evolution of technology. Investing in a power supply unit (PSU) with ample wattage and high-quality components can save you from the need for early replacements. Modular PSUs offer the flexibility to adjust cabling as your system expands.
By considering both the performance drop over time and forward compatibility, you can build a PC that not only meets your current needs but also adapts to future technological advancements.
Here’s a quick checklist to help you future-proof your build:
- Choose a motherboard with extra slots and connections for upgrades.
- Opt for a PSU with higher wattage than currently needed.
- Select components that support the latest technology standards.
- Stay informed about new hardware releases and industry trends.
Performance vs. Budget: Finding the Sweet Spot
Maintaining a balance between performance and budget is crucial when building a custom PC. It’s not necessary to upgrade every component simultaneously. Instead, identify and upgrade the bottleneck in your system, which is often the GPU or CPU, to achieve the most significant performance improvement for your money.
When constructing a custom PC, especially under a tight budget, it’s essential to prioritize parts that offer the best performance within your financial constraints.
Here are some tips to help you prioritize your purchases:
- Research and compare different options to get the best value for your money.
- Opt for a robust motherboard and power supply if you plan future upgrades, to avoid replacing these components later.
- While aesthetics are important, prioritize functionality over looks. Quality should come before visual appeal.
Remember, even with a limited budget, there are graphics cards and other components that provide satisfactory performance without breaking the bank. By carefully selecting each part, you can build a PC that not only meets your gaming needs but also stays within your budget.
Aesthetics and Personalization: Building a PC That Reflects You
When it comes to building a custom PC, aesthetics play a crucial role in making your rig truly yours. Personalization and aesthetics are not just about the visual appeal; they’re about expressing your individuality and creating a machine that’s uniquely yours. From the sleek lines of a minimalist case to the vibrant colors of RGB lighting, the choices you make can turn your gaming PC into a personal statement.
PeachieTech’s advice? First, determine your hardware goals for the build to know what base parts you need to work with. This foundational step ensures that your aesthetic choices complement the performance needs of your gaming rig. Remember, while it’s tempting to focus on looks, functionality should always be your priority. Here’s a simple list to help you balance aesthetics and performance:
- Choose a case that fits your desired look but also accommodates all your components comfortably.
- Select components with performance in mind, then consider their aesthetic aspects.
- Integrate RGB lighting to add a personalized flair without compromising the system’s efficiency.
- Manage cables meticulously for a clean and organized appearance that also promotes better airflow.
Don’t overspend on aesthetics at the cost of performance. A well-performing PC that looks good is better than a great-looking PC that doesn’t meet your gaming needs.
In conclusion, while personalizing your PC is an exciting aspect of the build process, it’s essential to strike a balance. Invest in quality components that will not only look good but also elevate your gaming experience.
The Importance of Brand and Warranty Considerations
When building a custom PC, the allure of selecting high-performance parts often overshadows the practicality of brand reputation and warranty policies. However, these factors are crucial for long-term satisfaction and support. Choosing a reputable brand is not just about quality; it’s about the peace of mind that comes with reliable customer service and support.
Warranty coverage is a significant advantage when purchasing pre-built systems or individual components. It ensures that in the event of a defect or failure, you’re protected. A comprehensive warranty can save you from unexpected costs and provide a clear path for repairs or replacements. Here’s a quick list of what to look for in warranty and support:
- A good warranty period that covers your needs
- Clear information on what is included in the warranty
- Reliable and accessible customer support
- A straightforward process for claims and repairs
Remember, the true value of a component goes beyond its specs. It includes the manufacturer’s commitment to their product through their warranty and support.
Finally, consider the ease of future upgrades. Brands that design their components with upgradability in mind not only extend the lifespan of your PC but also contribute to a more sustainable approach to technology.
Planning Your Build
Creating a Comprehensive Checklist
Before you dive into the assembly of your custom gaming PC, it’s crucial to make a plan and create a comprehensive checklist. This checklist will serve as your roadmap, ensuring you have all the necessary components on hand before you begin. Here’s a basic outline to get you started:
- CPU: The processor is the brain of your PC, handling calculations and tasks.
- GPU: Your graphics card is key for rendering images and video.
- Motherboard: This is the main circuit board that connects all components.
- RAM: Short-term memory that your PC uses to handle active tasks.
- Storage: SSDs for faster load times and HDDs for larger storage capacity.
- PSU: The power supply unit provides electricity to your system.
- Cooling: Adequate cooling prevents overheating and maintains performance.
- Case: A housing that protects your components and provides airflow.
- Peripherals: Monitors, keyboards, mice, and other input/output devices.
Remember, the quality and compatibility of these components will dictate the performance of your gaming PC. Prioritize your purchases based on your budget and the performance requirements of the games you wish to play.
Once you have your checklist ready, you can proceed to purchase your components with confidence, knowing that you’re well-prepared for the exciting task of building your gaming PC.
Understanding the Build Process: A Step-by-Step Guide

Embarking on the journey to build a gaming PC is not merely a task; it’s an epic adventure that awaits. This step-by-step guide will serve as your map through the realm of PC assembly, where you’ll learn to harness the power of each component to create a gaming desktop that stands as a testament to your courage and skill.
It’s essential to balance performance and functionality to create a powerful gaming setup.
Navigating the assembly process is crucial for a successful build. Understanding the step-by-step assembly guide and being aware of common mistakes to avoid can help you breeze through the installation with confidence. Here’s a quick checklist to ensure you’re on the right track:
- Preparing the Workspace and Tools
- Ensuring Component Compatibility
- Step-by-Step Assembly
- Troubleshooting Common Issues
- Optimizing Your Gaming Rig
Remember, a well-planned build is the foundation of a great gaming experience. Take your time to understand each step and enjoy the process of bringing your custom PC to life.
Tools and Workspace: Preparing for Assembly
Before embarking on the assembly of your custom PC, it’s crucial to prepare your workspace and tools. A clear, static-free surface is essential to avoid any potential damage to sensitive components. Here’s a list of tools you’ll need to ensure a smooth building process:
- Phillips-head screwdriver (specifically a Phillips No. 2)
- Anti-static wristband
- Pliers
- Zip ties for cable management
- Thermal paste for CPU cooler installation
Remember, a well-organized workspace not only facilitates a more efficient build but also minimizes the risk of losing small parts like screws or jumpers.
As you gather your tools, consider the layout of your workspace. Ensure there’s ample lighting and that your tools are within easy reach. This preparation stage sets the foundation for a successful build, allowing you to focus on the assembly without unnecessary interruptions.
Assembling Your Gaming PC
Step-by-Step Assembly Instructions
Embarking on the journey to build a gaming PC is an exciting adventure. It’s essential to balance performance and functionality to create a powerful gaming setup. Before you begin, ensure you have a clear workspace and the necessary tools at hand.
When it comes to building a gaming PC, navigating the assembly process is crucial for a successful build.
Follow this simple guide to assemble your gaming PC:
- Preparing the Workspace and Tools – Start with a clean, static-free environment and gather all required tools.
- Mounting the Motherboard – Carefully place the motherboard inside the case, aligning it with the standoffs.
- Installing the CPU – Secure the central processing unit into the motherboard socket, taking care not to bend any pins.
- Adding Memory (RAM) – Snap the RAM modules into their designated slots on the motherboard.
- Connecting the Power Supply – Attach the power supply unit to the case and connect it to the motherboard and other components.
- Installing Storage Devices – Mount and connect your SSDs or HDDs.
- Finalizing Connections – Ensure all cables are properly connected to their respective ports on the motherboard.
Remember, patience and attention to detail are your best tools. Take your time to double-check each step and enjoy the process of bringing your custom PC to life.
Troubleshooting Common Issues During Assembly
When your PC doesn’t power on, it can be a moment of panic. However, this is a common issue that can often be resolved with some basic troubleshooting. First, ensure that all cables are securely connected and that the power supply switch is in the ON position. If the problem persists, consider the following steps:
- Check if the motherboard standoffs are installed correctly to prevent shorts.
- Verify that the RAM is seated properly in its slots.
- Inspect the CPU and ensure that the thermal paste is applied correctly and the cooler is mounted firmly.
- Examine all power connections, including the 24-pin motherboard and 8-pin CPU power cables.
Remember, patience and careful examination of each component can save you from unnecessary stress and potential hardware damage.
If you’ve gone through these steps and the issue remains, it may be time to test individual components. A faulty part can be the culprit, and isolating it is key to getting your rig up and running. Keep in mind that sometimes, the simplest solutions, like reseating a cable, can resolve what seems like a complex problem.
Post-Assembly Checks: Ensuring Everything is in Order
After the assembly of your custom PC, it’s crucial to perform a series of post-assembly checks to ensure that everything is functioning as intended. Start by verifying that all components are properly seated and that there are no loose connections. This includes checking the CPU, GPU, RAM, and any expansion cards.
- Ensure that all power cables are securely connected to the motherboard and to the power supply.
- Check that the storage drives are correctly connected to the motherboard and that they are recognized by the BIOS.
- Confirm that the CPU cooler is properly mounted and that thermal paste has been applied correctly.
- Inspect the case for proper airflow and make sure that all fans are connected and functioning.
It’s also important to remember that some issues may not be immediately apparent. Running a series of stress tests can help identify any potential problems with hardware stability or cooling efficiency.
Lastly, review the BIOS settings to confirm that all hardware is detected and configured correctly. This is also a good time to update the BIOS to the latest version if necessary. By taking the time to perform these checks, you can avoid common mistakes and ensure a smooth and stable experience with your new custom PC.
Optimizing Performance
Fine-Tuning BIOS Settings
The BIOS (Basic Input/Output System) is the cornerstone of your PC’s functionality, acting as the interface between the computer’s hardware and its operating system. Fine-tuning the BIOS settings can significantly enhance your machine’s performance and stability. Adjustments in the BIOS can range from configuring the boot order to enabling virtualization features or setting up RAID configurations.
It’s crucial to approach BIOS adjustments with caution, as incorrect settings can lead to system instability or boot failures. Always ensure you have a clear understanding of each setting before making changes.
Here are some common BIOS settings to consider optimizing:
- Boot Priority: Set your preferred boot device order.
- Memory Profiles: Enable XMP (Extreme Memory Profile) for optimal RAM performance.
- CPU Settings: Adjust CPU multiplier and voltage for overclocking.
- Integrated Peripherals: Configure onboard devices and ports.
- Power Management: Optimize settings for energy efficiency or performance.
Remember, each motherboard manufacturer may have a different BIOS layout and terminology, so refer to your motherboard’s manual for specific guidance. After making changes, monitor your system’s performance to ensure the adjustments have the desired effect.
Overclocking: Risks and Rewards
Overclocking can be a thrilling way to enhance your gaming PC’s performance, pushing the CPU and GPU beyond their factory-set speeds to achieve higher frame rates and smoother gameplay. However, overclocking isn’t simply a way of turning every component up to its highest settings and reaping the rewards. There are some risks associated with this practice, such as increased heat output and potential hardware failure if not done correctly.
Overclocking can be likened to temporarily wielding a powerful artifact to boost your character’s abilities. It involves pushing your CPU beyond its default speed to squeeze out extra performance. This power comes with risks and requires adequate cooling solutions to prevent overheating.
To safely embark on the overclocking journey, consider the following steps:
- Understand your components’ limits: Not all hardware is created equal. Research the overclocking potential of your CPU and GPU to ensure they can handle the increased demands.
- Invest in cooling: Overcoming heating challenges is crucial. Whether it’s through improved airflow, strategic fan placement, or advanced liquid cooling, ensure your system can stay cool.
- Monitor temperatures: Use stress testing and temperature monitoring to evaluate stability and thermal performance, keeping components within safe operating limits.
- Start small: Incrementally increase clock speeds and test stability at each step. This cautious approach helps mitigate risks.
Remember, while the allure of boosted performance is tempting, the stability and longevity of your PC should not be compromised.
Software and Driver Updates: Keeping Your System Current
Ensuring that your custom PC operates at peak performance involves regular updates to both software and drivers. Keeping your operating system and hardware drivers up to date is crucial for system stability, security, and performance optimization. Software updates can patch security vulnerabilities, improve compatibility, and even unlock new features.
Regular updates are not just about adding new features; they often include critical fixes that can prevent potential system failures and enhance overall performance.
Here’s a simple checklist to help you stay on top of updates:
- Check for operating system updates at least once a month.
- Update your graphics card drivers, especially when new games are released.
- Keep your motherboard’s BIOS or UEFI firmware updated for the latest support and troubleshooting features.
- Regularly update your games and any gaming-related software to benefit from the latest patches and improvements.
- Don’t forget peripheral drivers, such as those for your keyboard, mouse, and headset, to ensure they are functioning optimally.
Enhancing Your Gaming Experience
Selecting the Best Graphics Cards for Immersive Gameplay
The graphics card is a pivotal component that dictates the visual quality of your gaming experience. NVIDIA and AMD offer top-of-the-line GPUs like the NVIDIA GeForce RTX 3080 or the AMD Radeon RX 6800 XT, capable of rendering lifelike graphics and supporting ray tracing technology. Investing in a powerful graphics card ensures smooth gameplay and allows you to immerse yourself in the stunning visuals of the latest gaming titles.
Embarking on the quest to select the perfect graphics card is akin to unlocking a chest filled with the potential to render the fantastical realms of your favorite games into stunning reality.
Even without a lavish budget, you can discover graphics cards that deliver commendable performance. These budget-friendly GPUs provide a gateway to enjoyable gaming experiences, ensuring you don’t miss out on captivating adventures due to financial constraints. Below is a guide to the best options that balance cost and performance:
- Budget-Friendly GPUs without Compromising Performance
- Mid-range GPUs for Smooth 1080p and 1440p Gaming
- Flagship GPUs for 4K Gaming and Beyond
Navigating the landscape of graphics cards with an informed perspective will ensure that your gaming setup is capable of delivering the performance you desire and provides a visually stunning experience that immerses you fully in your gaming adventures.
High-Refresh-Rate Monitors and the Impact on Gaming
The advent of high-refresh-rate monitors has been a game-changer for the competitive gaming scene. Monitors with refresh rates of 144Hz or higher significantly enhance the fluidity and responsiveness of gameplay. This is particularly crucial in fast-paced games where every millisecond counts.
The difference between a standard 60Hz monitor and a 144Hz or higher display is not just noticeable; it’s transformative. The smoother transition of images reduces eye strain and provides a more immersive gaming experience.
Here’s a quick comparison of popular high-refresh-rate monitors:
| Monitor Model | Size | Resolution | Refresh Rate |
|---|---|---|---|
| ASUS TUF VG259QM | 24.5″ | 1920 x 1080 | 280 Hz |
| ASUS ROG Swift PG27AQN | 27.0″ | 2560 x 1440 | 360 Hz |
| ASUS ROG Swift OLED PG27AQDM | 26.5″ | 2560 x 1440 | 240 Hz |
Selecting the right monitor is about balancing performance with budget. While a 360 Hz monitor offers the pinnacle of refresh rates, a 240 Hz display can still provide a vastly superior experience compared to traditional 60Hz screens. It’s essential to choose a monitor that not only matches your GPU’s capabilities but also fits your gaming preferences and budget.
Ergonomic Peripherals for Comfort and Precision
When it comes to extended gaming sessions, the comfort and precision of your peripherals can make a significant difference. Ergonomic designs in mice and keyboards are tailored to reduce strain and improve gameplay. For instance, the Razer Basilisk V3 is a standout ergonomic gaming mouse with a supportive right-handed shape and thumb rest, enhancing your control and comfort.
In the realm of keyboards, models like the Razer Huntsman Tournament Edition offer rapid actuation and tactile feedback, which are essential for fast-paced games. The addition of RGB lighting also allows for a personalized touch to your gaming environment.
The right peripherals are not just about performance; they’re about ensuring comfort during those marathon gaming sessions, preventing fatigue and discomfort.
Here’s a quick list of ergonomic peripherals to consider for your setup:
- Razer Basilisk V3: An ergonomic gaming mouse with a thumb rest for added support.
- Razer Huntsman Tournament Edition: A keyboard with rapid actuation for responsive gameplay.
- Ultralight X Mouse: One of the lightest mice available, designed for speed and minimal resistance.
- DROP + Sennheiser PC38X Headset: For immersive audio that captures every in-game detail.
Maintaining Your Custom PC
Regular Cleaning and Dust Management
Maintaining a dust-free environment inside your PC is crucial for its performance and longevity. Regularly check and clean your air filters to prevent dust build-up and maintain optimal performance. One of the first signs of a significant dust buildup is when you can see it on the dust filters adjacent to your intake fans. It’s best not to just wipe it off, as this can push dust further into your system.
Remember, a clean system is a happy system. While air filters are necessary, they can slightly reduce airflow. Balance the need for filtration with the need for adequate air movement within your PC casing.
Proper fan positioning for intake and exhaust flow is essential in maintaining balanced airflow. Implementing air filters and practicing cable management are vital for sustaining clean airflow and efficient system cooling. Here are some maintenance tips:
- Keep It Clean: Dust accumulation can lead to overheating. Open your case every few months to dust off components with compressed air.
- Update Regularly: Software updates often include performance improvements and bug fixes.
- Proper Fan Positioning: Intake and exhaust flow techniques are significant for balanced airflow.
- Air Filters and Cable Management: These practices are crucial for clean airflow and system cooling.
Hardware Upgrades: When and How to Upgrade
Knowing when to upgrade your PC components is crucial for maintaining optimal performance. It’s often more cost-effective to upgrade individual parts rather than purchasing a new system. Here are some indicators that it’s time to consider an upgrade:
- Frequent lag or low frame rates during gameplay
- Hardware is several years old and struggles with new software
- Incompatibility with emerging technologies
Before upgrading, it’s essential to check the compatibility requirements of your desired hardware. Consult the relevant documentation and recommendations to ensure a smooth transition. For example:
Upgrading your GPU may require a power supply with higher wattage. Always verify that your system can support the new component.
Maintaining a balance between performance and budget is key. You don’t need to upgrade all components at once. Focus on the bottleneck in your system, often the GPU or CPU, to get the most significant performance boost for your investment.
Monitoring System Health and Temperatures
Keeping a vigilant eye on your gaming PC’s health is crucial for ensuring peak performance and longevity. Monitoring temperatures is a key aspect of this, as excessive heat can lead to hardware damage and performance degradation. Utilize tools like HWMonitor to keep tabs on temperatures, fan speeds, and voltages.
Regular temperature checks during heavy gaming sessions or stress tests can help you spot potential issues before they escalate into serious problems.
Understanding the importance of temperature regulation can’t be overstated. It not only maintains components at safe operating temperatures but also contributes to system longevity and energy efficiency. Here’s a quick rundown of why temperature monitoring should be part of your routine:
- Temperature Regulation: Ensures components are within safe operating thresholds.
- System Longevity: Minimizes thermal stress, extending the lifespan of parts.
- Energy Efficiency: Optimizes the power-to-cooling ratio, potentially lowering electricity costs.
Remember, maintaining a streamlined airflow is essential to prevent hot spots that can harm performance and hardware integrity.
The Social Aspect of PC Gaming
Joining Gaming Communities and Forums
When you embark on the journey of building your custom PC, you’re not alone. Joining gaming communities and forums can be a transformative part of the experience. These platforms offer a wealth of knowledge and a place to share your passion with like-minded individuals. From troubleshooting to celebrating new builds, the sense of community is palpable.
Engaging with online forums and social media groups can lead to discovering new trends, getting personalized advice, and forming lasting friendships within the gaming world.
Here are some popular forums where you can start your adventure:
- JoyFreak | Gaming Forums | Gaming Community
- PC Master Race on Reddit
- Overclock.net for performance enthusiasts
- Tom’s Hardware for in-depth discussions and reviews
Remember, every question you have has likely been asked before, and every obstacle you encounter has probably been overcome by someone else. The community is there to support and inspire you throughout your PC building journey.
Sharing Your Build and Gaming Experiences
Once your custom PC is up and running, sharing your build and gaming experiences can be incredibly rewarding. Engaging with the community not only showcases your hard work but also inspires others and opens the door to feedback that can further refine your rig.
- Post photos and specs of your build on social media and forums.
- Write about the challenges you faced and how you overcame them.
- Share benchmarks and performance reviews to help fellow enthusiasts.
By sharing your journey, you contribute to a culture of learning and improvement within the PC gaming community.
Remember, every shared experience is a potential learning opportunity for someone else. Whether it’s a unique cable management solution or a custom cooling setup, your insights can help others make informed decisions for their own builds.
Collaborative Gaming and Streaming
The rise of collaborative gaming and streaming has transformed the way we experience video games, turning solitary play into a shared, social event. With the ability to stream gameplay live, gamers can now connect with audiences around the world, showcasing their skills and building communities.
- Community and Support: The gaming PC community is a hub of shared knowledge and enthusiasm. Online forums and social media groups offer support and camaraderie, making PC building a collective journey.
- Gaming Peripherals: High-quality peripherals are key for an immersive experience. They should be chosen to complement the gaming PC and enhance overall enjoyment.
Investing time and effort into the perfect gaming setup elevates every session to a deeply immersive and satisfying experience.
Technologies like ray tracing and DLSS are revolutionizing game visuals, making streaming content more engaging than ever. As gamers unite across the globe, the social aspect of gaming continues to grow, fostering connections and creating a vibrant, inclusive community.
Conclusion: The Rewarding Journey of Building Your Custom Gaming PC
In the pursuit of the ultimate gaming experience, constructing a custom PC is not just about the assembly of components—it’s a personal voyage into the heart of technology and creativity. This article has guided you through the essentials of selecting the right parts, understanding compatibility, and the step-by-step process of bringing your dream machine to life. Remember, each choice from the CPU to the GPU, the RAM, and beyond, is a building block towards a rig that not only meets your performance expectations but also embodies your individuality. Whether you’re a veteran builder or taking your first steps into the world of custom PCs, the satisfaction of powering up your bespoke gaming rig for the first time is unparalleled. Embrace the challenge, enjoy the process, and revel in the pride of owning a gaming powerhouse that is truly yours.
Frequently Asked Questions
Why should I consider building a custom gaming PC instead of buying a pre-assembled one?
Opting for a custom-built gaming rig grants you the freedom to choose every component to match your specific desires, potentially saving costs, and provides a sense of pride in your creation. It allows for a tailored gaming experience and the opportunity to learn and understand technology better.
What are the essential components I need to understand before building a gaming PC?
The essential components include the CPU (Central Processing Unit), GPU (Graphics Processing Unit), RAM (Random Access Memory), storage (SSD/HDD), motherboard, power supply, cooling system, and peripheral connections like monitors and keyboards.
How can I ensure the components I choose are compatible with each other?
To ensure compatibility, check the specifications and requirements of each component. Use compatibility checking tools online, consult with forums or experienced builders, and refer to the motherboard’s manual for supported hardware.
What factors should I consider when balancing performance and budget in a gaming PC?
Consider the types of games you want to play and their system requirements, prioritize components like the CPU and GPU, and look for the best value-for-money parts. Set a budget and allocate funds to critical components while finding cost-effective alternatives for others.
How do I plan my custom PC build effectively?
Create a comprehensive checklist of components, tools, and accessories you need. Research each part thoroughly, consider your build’s purpose, and plan your budget. Follow a step-by-step guide to ensure you don’t miss any critical steps in the assembly process.
What are some common issues I might face during the assembly of my gaming PC?
Common issues include improper seating of components, incorrect wiring, compatibility issues, or faulty parts. Always double-check connections, ensure components are seated properly, and test the system outside the case first to troubleshoot effectively.
How can I optimize my gaming PC’s performance after assembly?
Optimize performance by fine-tuning BIOS settings, updating drivers, and considering overclocking for enhanced performance. Regularly monitor system health and temperatures, and keep the software up to date.
What are the benefits of involving family, especially kids, in building a gaming PC?
Involving family members, especially kids, in assembling a gaming PC can provide educational benefits, foster collaborative and problem-solving skills, and create lasting memories through this enriching and collaborative project.
Building the Good Custom PC? Don’t Skimp on Components! Volta PC Has Your Back.
A custom PC is only as good as the parts that go into it. If you want a machine that delivers peak performance and stands the test of time, you need quality components. That’s where Volta PC shines!
We curate a selection of the best:
- Powerful Processors: Intel and AMD CPUs to form the heart of your rig.
- High-Performance Graphics Cards: Unleash stunning visuals and smooth framerates.
- Reliable Motherboards: The foundation that ties everything together.
- Fast RAM & Storage: Keep your games and applications snappy.
- Efficient Power Supplies: The lifeblood of your system.
Plus, our experts offer:
- Compatibility guidance to ensure everything works in harmony.
- Build advice to help you achieve your performance goals.
Don’t compromise on your dream build. Visit Volta PC and discover the high-quality components you need to create a truly exceptional custom PC.