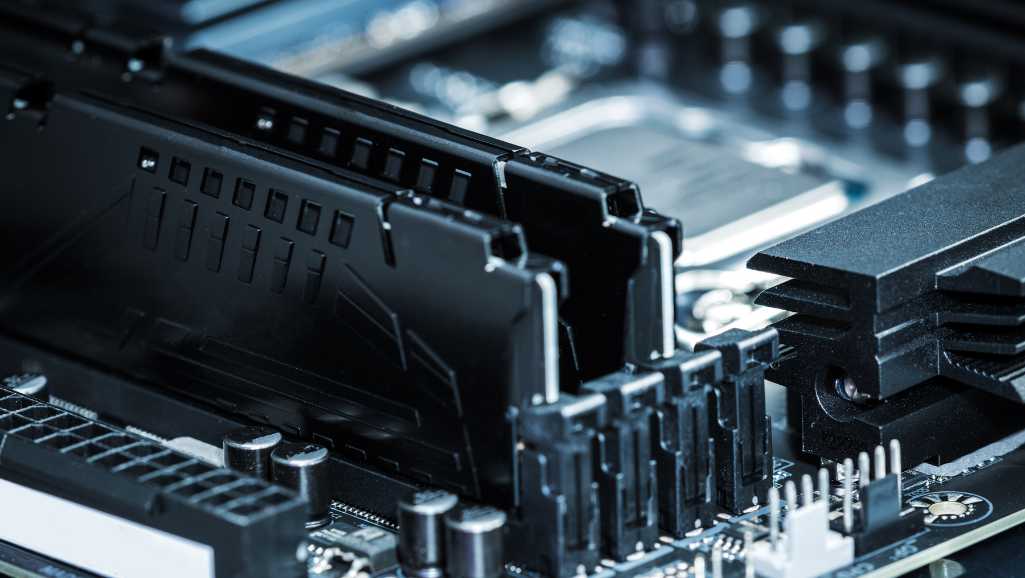
Gaming PCs are powerhouses designed to handle the most demanding games and applications. One key component that significantly influences your gaming experience is RAM. It’s the backbone of your system’s memory, ensuring smooth performance and quick load times. However, not all RAM is created equal. To get the most out of your gaming PC, you need to optimize your RAM settings. This is where Intel XMP profiles come into play.
Intel’s Extreme Memory Profiles (XMP) offer an easy way to enhance your RAM’s performance. By enabling XMP, you can unlock higher memory speeds and improved timings, translating to better gaming performance. This article will guide you through everything you need to know about using Intel XMP profiles to optimize RAM performance in your gaming PC. We will explore the technical details, practical steps, and real-world benefits of using XMP, ensuring that you can maximize your gaming rig’s potential.
Understanding RAM and Its Role in Gaming PCs
RAM, or Random Access Memory, is crucial for your gaming PC’s performance. It temporarily stores data that your CPU needs quick access to, which speeds up your system and allows for multitasking. When you play games, RAM stores the game data that your CPU might need to access rapidly, like textures, maps, and other assets.
The amount and speed of your RAM can greatly affect your gaming experience. More RAM allows you to run more complex games and applications simultaneously. High-speed RAM can improve your game’s frame rates and load times. However, not all RAM operates at its maximum potential right out of the box. Many RAM modules come with base speeds that are lower than their potential. This is where XMP profiles make a significant difference.
To understand this better, think of RAM as a temporary workspace for your computer. The more space and faster access you have in this workspace, the more efficiently your system can handle complex tasks. Games today require a significant amount of data processing, from rendering high-definition graphics to managing in-game physics. This means that the speed and capacity of your RAM directly influence your gaming experience.
In addition to capacity and speed, latency is another crucial aspect of RAM performance. Latency refers to the time it takes for the RAM to respond to a request from the CPU. Lower latency means faster response times, which can enhance the smoothness and responsiveness of your games. High-performance RAM, especially when optimized with XMP profiles, can offer lower latencies, providing a noticeable boost in gaming performance.
What are Intel XMP Profiles?
XMP, or Extreme Memory Profile, is a technology developed by Intel that allows you to overclock your RAM easily. Overclocking means running your RAM at a higher speed than its default setting, which can enhance your gaming performance. XMP profiles are pre-configured settings stored in the RAM’s SPD (Serial Presence Detect) chip, which you can activate via your motherboard’s BIOS/UEFI.
These profiles are designed to be stable and optimized, ensuring that your RAM can run at higher speeds without crashing your system. XMP profiles simplify the process of overclocking by providing safe, tested settings that you can enable with a few clicks. This ease of use makes XMP profiles a popular choice among gamers looking to boost their system’s performance.
Intel introduced XMP to make memory overclocking accessible to a broader audience. Previously, overclocking required extensive knowledge and manual adjustment of settings, which could be risky and time-consuming. With XMP, Intel aimed to simplify this process, offering profiles that are specifically tested and validated for stability and performance.
There are usually two types of XMP profiles available: Profile 1 and Profile 2. Profile 1 typically offers more conservative settings to ensure compatibility and stability across a wide range of systems. Profile 2, on the other hand, pushes the memory closer to its performance limits, offering higher speeds and tighter timings. Depending on your system and your tolerance for potential instability, you can choose the profile that best suits your needs.
Preparing Your Gaming PC for XMP
Before you enable XMP, you need to ensure that your system is ready. Here are some steps to prepare your gaming PC:
- Check RAM Compatibility: Not all RAM modules support XMP. Check your RAM’s specifications to confirm compatibility. Most modern high-performance RAM modules support XMP.
- Update BIOS/UEFI Firmware: Ensure your motherboard’s BIOS/UEFI is up to date. Manufacturers frequently release updates that improve system stability and compatibility with new hardware.
- Backup Important Data: While enabling XMP is generally safe, it’s always a good idea to back up any important data before making changes to your system settings.
In addition to these steps, it’s essential to ensure that your power supply unit (PSU) is robust enough to handle the increased power demands that come with overclocking your RAM. Overclocking can increase the voltage requirements, and an inadequate PSU might lead to system instability or even hardware damage.
Another important aspect is cooling. Overclocked components tend to generate more heat, and insufficient cooling can lead to thermal throttling or system crashes. Ensure that your PC has adequate airflow and consider upgrading your cooling solutions, such as adding extra fans or using liquid cooling systems.
How to Enable Intel XMP Profiles
Enabling XMP profiles is a straightforward process. Here’s how you can do it:
- Access BIOS/UEFI: Restart your gaming PC and enter the BIOS/UEFI. This is usually done by pressing a key like F2, Del, or Esc during the boot process.
- Navigate to the Memory Settings: Look for a section labeled “Memory” or “DRAM Configuration.” This section might be under “Advanced Settings” or a similar tab.
- Select XMP Profile: You’ll see an option to enable XMP. Select it and choose the profile you want to use. Most RAM modules come with multiple XMP profiles, typically labeled as Profile 1 and Profile 2.
- Save and Exit: Save your changes and exit the BIOS/UEFI. Your system will restart with the new settings.
After enabling XMP, you should verify that your RAM is running at the correct speed. You can do this by checking the memory settings in your BIOS/UEFI or using software tools like CPU-Z. These tools provide detailed information about your system’s memory configuration, including speed, timings, and voltage.
It’s also a good idea to run stability tests after enabling XMP. Programs like MemTest86 can help ensure that your RAM is functioning correctly and that there are no errors. This step is crucial because even though XMP profiles are pre-tested, every system is different, and slight variations in hardware can affect stability.
Benefits of Using XMP Profiles in Gaming PCs
Enabling XMP profiles can bring several benefits to your gaming PC:
- Improved Game Load Times: Faster RAM speeds reduce the time it takes for games to load, allowing you to get into the action quicker.
- Enhanced Frame Rates: Higher RAM speeds can lead to improved frame rates, providing a smoother and more enjoyable gaming experience.
- Better System Responsiveness: With optimized RAM settings, your system will respond faster to inputs and multitask more efficiently.
These improvements can make a noticeable difference, especially in demanding games that rely heavily on fast memory access. For example, open-world games with large maps and complex environments benefit greatly from faster RAM, as they require quick access to vast amounts of data.
Moreover, enabling XMP can also enhance other aspects of your computing experience. Tasks such as video editing, 3D rendering, and running virtual machines can see significant performance gains with faster RAM. This makes your gaming PC not just a powerhouse for gaming but also a versatile machine capable of handling a wide range of demanding applications.
Potential Risks and Troubleshooting
While enabling XMP is generally safe, there are potential risks and issues you might encounter:
- System Instability: In rare cases, enabling XMP can cause system instability. This can manifest as random crashes, blue screens, or failure to boot. If this happens, you might need to tweak the settings manually or revert to default.
- Compatibility Issues: Some motherboards and CPUs might not fully support the highest XMP profiles. Always check compatibility before enabling XMP.
- Overheating: Higher RAM speeds can lead to increased heat output. Ensure your system has adequate cooling to handle the extra heat.
If you encounter any issues, start by reverting to the default settings in the BIOS/UEFI. You can also try updating your motherboard’s firmware or adjusting the settings manually. In some cases, you might need to increase the voltage slightly to stabilize the RAM at higher speeds.
It’s also important to monitor your system’s temperatures. Use software tools to keep an eye on the temperatures of your CPU, GPU, and RAM. If you notice significant temperature spikes, consider improving your cooling solutions. This might involve adding more case fans, upgrading to a better CPU cooler, or even investing in a liquid cooling system.
Advanced Tips for Optimizing RAM Performance
For those looking to squeeze every bit of performance out of their RAM, here are some advanced tips:
- Manual Tweaking: If you’re comfortable, you can manually adjust your RAM timings and voltages to achieve even better performance. This requires a good understanding of how memory timings work. You can use tools like Ryzen DRAM Calculator (for AMD systems) or various online resources to find optimal settings.
- Software Tools: Use tools like MemTest86 to test your RAM’s stability after making changes. This helps ensure your system remains stable under load. Additionally, monitoring software like HWMonitor or AIDA64 can provide detailed insights into your system’s performance and temperatures.
- Cooling Solutions: High-performance RAM can generate extra heat. Consider adding additional cooling solutions like RAM heatsinks or improving overall airflow in your case. Ensuring that your case is free from dust and that cables are managed properly can also improve airflow and cooling efficiency.
Another advanced technique involves adjusting the Command Rate (CR) of your RAM. The Command Rate is the delay between when a memory chip is selected and when the first active command can be issued. Lowering the Command Rate can improve performance, but it can also affect stability. Experimenting with different settings and conducting thorough stability tests can help you find the optimal configuration for your system.
Case Studies and Real-World Examples
To illustrate the benefits of using XMP profiles, let’s look at some real-world examples. Gamers have reported significant improvements in their setups after enabling XMP. For instance, one gamer with a mid-range gaming PC saw their average frame rate in a demanding game like Cyberpunk 2077 increase by 15%. Load times were also noticeably shorter, enhancing the overall gaming experience.
Benchmark tests consistently show that systems with XMP-enabled RAM perform better in both gaming and general computing tasks compared to those with standard RAM settings. These real-world examples demonstrate that enabling XMP can provide a tangible boost to your gaming PC’s performance.
Another example involves a content creator who frequently works with 4K video editing. After enabling XMP, they noticed a significant reduction in rendering times, allowing them to complete projects faster and more efficiently. This highlights the versatility of XMP profiles, benefiting not only gamers but also professionals who require high-performance computing.
In competitive gaming, every millisecond counts. Professional eSports players often optimize their systems to the highest degree possible. Many of these players use XMP profiles to ensure their RAM operates at peak performance, providing them with the responsiveness and speed needed to stay ahead of the competition.
Conclusion
Optimizing your gaming PC’s RAM performance using Intel XMP profiles is a straightforward and effective way to enhance your gaming experience. By enabling XMP, you can unlock higher memory speeds and improve your system’s responsiveness, leading to better frame rates, faster load times, and a smoother gaming experience overall.
Don’t let your RAM operate below its potential. Take the time to check your RAM’s capabilities, update your BIOS/UEFI, and enable XMP profiles to get the most out of your gaming PC. With the right settings, you can achieve a performance boost that makes your gaming sessions more enjoyable and immersive.
By following this guide, you’ll be well on your way to optimizing your gaming PC and enjoying the full benefits of high-performance RAM. Happy gaming!
If you’re looking to elevate your gaming experience, it’s time to upgrade your hardware.
Whether you need faster RAM to reduce load times and improve frame rates or a brand-new gaming PC to handle the latest games effortlessly, VOLTA PC has you covered. By upgrading your RAM, you can unlock smoother gameplay and quicker response times, giving you a competitive edge. Alternatively, investing in a new gaming PC ensures you have the latest technology and highest performance for the most immersive gaming experience. At VOLTA PC, you’ll find top-of-the-line components and custom-built systems tailored to your gaming needs. Don’t let outdated hardware hold you back. Visit VOLTA PC today for the best deals on RAM upgrades and gaming PCs, and take your gaming to the next level. Unleash the full potential of your setup and enjoy the ultimate gaming performance!
-
 GSKILL Ripjaws M5 RGB / DDR5 6000 MT/s / 32GB / F5-6000J3648D16GX2-RM5RK$215.00 w/GST
 - GSKILL Ripjaws M5 RGB / DDR5 6000 MT/s / 64 GB / 30-40-40-96 (White)$399.00 w/GST
- GSKILL Ripjaws M5 RGB / DDR5 6000 MT/s / 64 GB / 30-40-40-96$399.00 w/GST
- GSKILL Ripjaws M5 RGB / DDR5 6000 MT/s / 32GB / 30-40-40-96 (White)$215.00 w/GST
- GSKILL Ripjaws M5 RGB / DDR5 6000 MT/s / 32GB / 30-40-40-96$215.00 w/GST
- GSKILL DDR5 ZETA R5 Series (RDIMM/ AMD) – DDR5/128GB/6400 MHz – F5-6400R3239G32GQ4-ZR5NK$1,879.00 w/GST
- GSKILL DDR5 ZETA R5 Series (RDIMM/ AMD) – DDR5/64GB/6400 MHz – F5-6400R3239G16GQ4-ZR5NK$929.00 w/GST
- Product on saleGSKILL DDR5 ZETA R5 Series (RDIMM/ Intel XMP) – DDR5/128GB/6400 MHz – F5-6400R3239G16GE8-ZR5KOriginal price was: $2,035.00.$1,899.00Current price is: $1,899.00. w/GST
- Product on saleGSKILL DDR5 ZETA R5 Series (RDIMM/ Intel XMP) – DDR5/64GB/6400 MHz – F5-6400R3239G16GQ4-ZR5KOriginal price was: $999.00.$979.00Current price is: $979.00. w/GST
- Product on saleGSKILL DDR5 ZETA R5 Series (RDIMM/ Intel XMP) – DDR5/128GB/6000 MHz – F5-6000R3039G16GE8-ZR5KOriginal price was: $1,949.00.$1,915.00Current price is: $1,915.00. w/GST
Follow Us on Social Media
Thermal Pads vs. Thermal Paste: Which Is Best for Your Gaming PC?
In the fast-paced world of gaming PCs, efficient thermal management is critical to maintain optimal…
Mastering Gaming Laptop Power: Monitor & Analyze with HWInfo
Gaming laptop are powerful machines, designed to handle demanding games and applications. However, this power…
How to Use Intel XMP Profiles to Optimize RAM Performance in Gaming PC
Gaming PCs are powerhouses designed to handle the most demanding games and applications. One key…
Configuring RAID 0 for Speed on a Gaming PC
When it comes to building a high-performance gaming PC, every millisecond counts. Gamers strive for…
Slow Boot Times in Gaming Laptops: Causes and Solutions
As gamers, we crave speed and performance. Whether it’s in-game action or simply booting up…
How to Set Up Ultrawide Monitor for Gaming PC with Nvidia Surround
The gaming landscape has evolved dramatically, and so has the hardware that powers it. Among…