If you’ve ever wondered “How to install AIO CPU cooler?” you’re in the right place. With the rising popularity of AIO coolers due to their superior cooling and aesthetic appeal, understanding how to install them can enhance your PC’s performance and longevity. This guide walks you through each step of the installation process, making it easier than ever to get your AIO cooler up and running.
Understanding the Basics
Before diving into the how to install an AIO CPU cooler, it’s essential to understand the basics.
First and foremost, let’s look at how a CPU cooler works.
The thermal paste, or thermal compound, is a vital player in the cooling process. It’s applied between the CPU and the cooler. Its function? To improve heat transfer. Specifically, it fills the microscopic air gaps that exist between the two surfaces. Consequently, it allows for more efficient heat dissipation. Remember, a well-applied thermal paste can significantly improve cooling performance.
Next, we have the heat sink and fan. The heat sink is a piece of metal with fins. It draws heat away from the CPU. How? Through direct contact. Subsequently, the heat gets dispersed into the air. That’s where the fan comes in. It helps accelerate this process. Specifically, by pushing the hot air away. Hence, the combined operation of the heat sink and fan is crucial for cooling the CPU.
Now, why is cooling so important for CPU performance?
The answer lies in the nature of CPUs. They generate heat. Especially when running demanding tasks. If this heat isn’t properly managed, it can lead to throttling. In other words, the CPU slows down to prevent damage. This can hurt your gaming experience. Hence, a good cooler helps maintain optimal CPU performance.
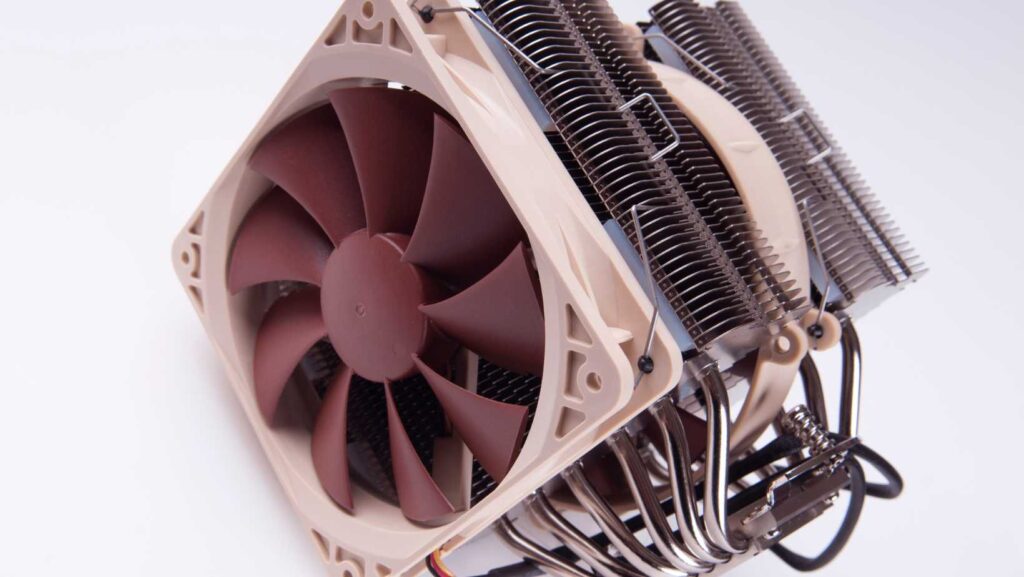
AIO coolers offer several advantages over traditional air coolers.
Firstly, they’re generally more efficient at cooling. Particularly for high-performance CPUs. Secondly, they provide better airflow inside the PC case. This can benefit other components as well.
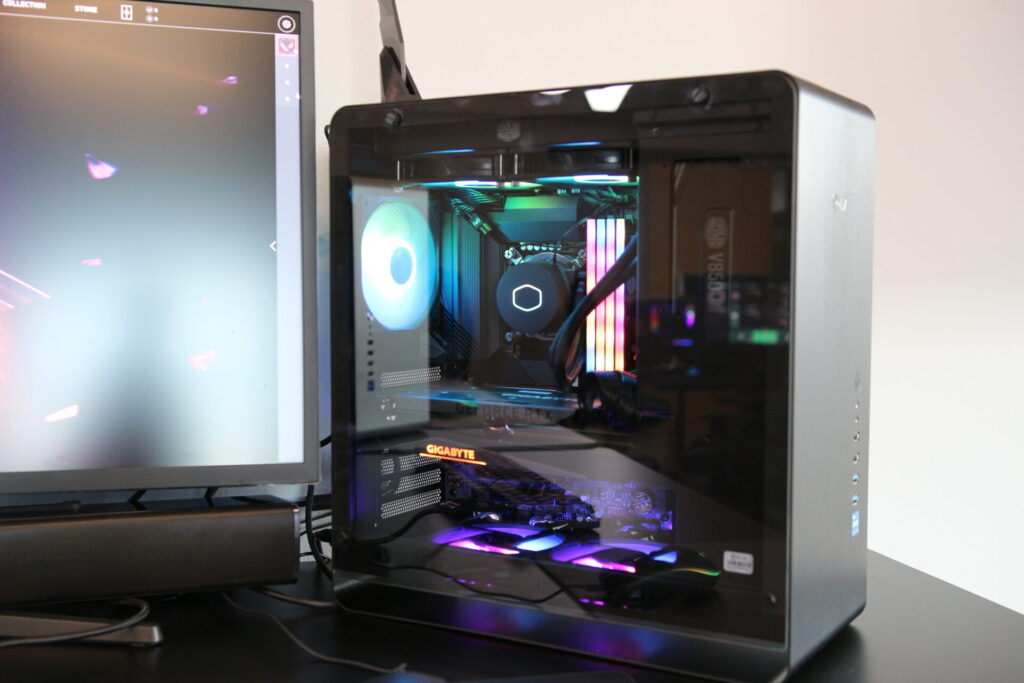
AIO coolers also score high on aesthetics. They come with sleek designs and often include RGB lighting. This can add a touch of style to your gaming PC.
In terms of noise, AIO coolers are usually quieter than air coolers. Especially when running at full speed. This can make for a more enjoyable gaming experience.
On the flip side, AIO coolers tend to require more maintenance.
This is largely due to the various components that make up the AIO system. Specifically, these include the pump, radiator, and fans.
The pump, being a mechanical part, can wear out over time. This can lead to lower performance or even failure. Regularly monitoring the pump’s operation can help detect any signs of issues early. In that case, early intervention can prevent more serious problems. On the other hand, if the pump fails, the entire cooler usually needs to be replaced.
The radiator and fans can accumulate dust. This can reduce their cooling efficiency. Hence, they need to be cleaned regularly. A can of compressed air can help remove dust without damaging the components.
As for longevity, AIO coolers can have a shorter lifespan compared to air coolers. This is mainly due to the pump. While fans in air coolers can also wear out, they’re generally easier and cheaper to replace. Pumps in AIO coolers, on the other hand, can’t be replaced separately. If the pump fails, the entire cooler usually needs to be replaced.
Purchasing the Right AIO Cooler
You’re now equipped with basic knowledge. It’s time to step up your game. Notably, we’re moving on to selecting the perfect AIO cooler. After all, you wouldn’t want just any cooler for your gaming PC, right? So, let’s get started.
Firstly, it’s important to consider the various brands and models.
Of course, there are numerous options available. For instance, brands like Corsair, NZXT, and Cooler Master are quite popular. Furthermore, they offer a wide range of models. Consequently, you can find something that suits your specific needs.
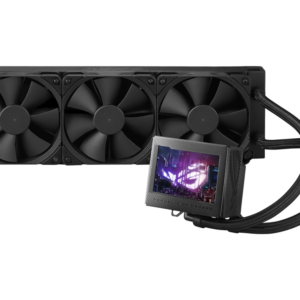
Let’s explore some factors to consider when making your purchase. Undeniably, the number of fans is a key factor. Notably, AIO coolers come with single, dual, or triple fan setups. In general, more fans mean better cooling. However, they may also result in increased noise levels. Therefore, you need to strike a balance.
Secondly, you should look at the radiator size.
Obviously, larger radiators can dissipate more heat. However, they also take up more space. Given these points, ensure your PC case can accommodate the radiator size.
Common radiator sizes are based on the fan measurements:
| Radiator Size | Fan Configuration | Typical Cooling Performance | Case Size Required |
|---|---|---|---|
| 120mm | 1 x 120mm fan | Suitable for most CPUs, minimal cooling performance | Small to medium |
| 240mm | 2 x 120mm fans | Better cooling performance than 120mm | Medium to large |
| 280mm | 2 x 140mm fans | Better cooling performance than 240mm | Large |
| 360mm | 3 x 120mm fans | Best cooling performance among common sizes, suitable for high-end CPUs | Large |
Keep in mind that while a larger radiator can provide better cooling performance, it also requires more space in your PC case. Therefore, it’s important to ensure your case can accommodate the size of the radiator before purchasing an AIO cooler.
In addition, different brands may offer different sizes. For instance, brands like NZXT, Corsair, and Arctic have AIO coolers that support a variety of radiator sizes.
It’s also worth noting that some newer CPU sockets, like Intel’s LGA 1700, may require a larger radiator due to their increased heat output. Always check the product specifications and compatibility before making a purchase.
Next, consider the noise levels.
The noise level of an AIO cooler is an important factor to consider, especially if you prioritize a quiet PC setup. While a cooler’s noise level can depend on several factors, there are generally two main sources of noise in an AIO cooler: the fans and the pump.
Fans produce noise when they spin to push air through the radiator. The speed of the fan, measured in revolutions per minute (RPM), can influence the noise level. A higher RPM usually means more noise. However, fan design also plays a role. Some fans are designed to optimize airflow and reduce noise.
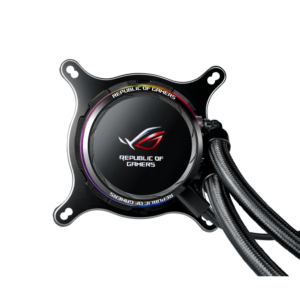
The pump, which circulates the coolant, can also make noise. Pump noise is usually constant, as the pump is always running when the PC is on. However, the volume can vary based on the pump’s quality and design.
Another factor to look at is aesthetics.
While it may be true that performance is crucial, you can’t ignore aesthetics. Especially, if you have a transparent PC case. Surprisingly, AIO coolers now come with RGB lighting. Correspondingly, they can give your gaming PC a cool, futuristic look.
Where can you buy your AIO cooler?
In this case, there are several options. Obviously, you can buy from physical retail stores. Alternatively, you can purchase online. Volta PC is a reputable retailer in Singapore that offers a variety of AIO CPU coolers. Some of the notable models that you can find on their website include:
-
 ASUS ROG RYUO 240 OLED AIO CPU COOLER (3Y)$339.00 w/GST
 -
 ASUS ROG STRIX LC II 240 ARGB AIO CPU COOLER (6Y))$299.00 w/GST
 -
 ASUS RYUJIN III 360 AIO CPU COOLER (6Y)$549.00 w/GST
In conclusion, purchasing the right AIO cooler is a crucial step. As a result, you need to consider various factors. These include the brand, model, and number of fans. In addition, consider the radiator size, noise levels, and aesthetics. Finally, decide where to make your purchase.
In the following section, we’ll guide you through the installation process. So, stay tuned! We have a lot more in store for you.
How To Install AIO Cpu Cooler For Your Gaming PC
Let’s dive into the installation process. Certainly, this is a crucial step in setting up your gaming PC. With this in mind, let’s break it down into manageable chunks.
Firstly, gather the necessary tools.
Usually, you’ll need a screwdriver. Additionally, you may need pliers and tweezers. Obviously, having the right tools makes the process easier. Furthermore, it prevents damage to your components.
Safety is equally important. In particular, be aware of static electricity. In fact, it can damage your PC components. Consequently, use an anti-static wrist strap. This will ground you. As a result, it will prevent static discharge.
Now, let’s move on to the actual installation.
1. Firstly, unbox your AIO cooler.
At this point, familiarize yourself with all the parts. Indeed, it’s easier to install AIO CPU cooler when you know what each part does.
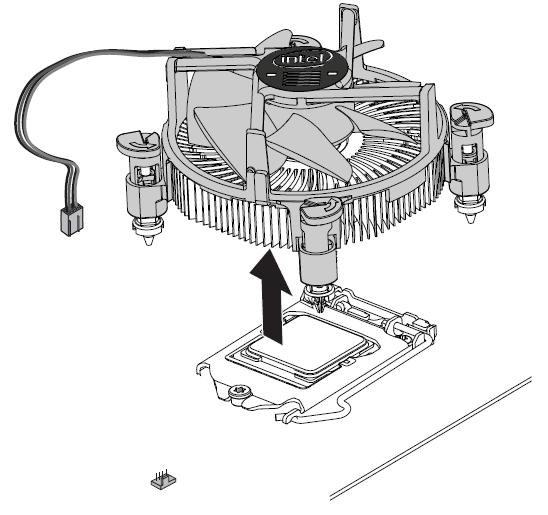
2. Next, remove the old cooler.
Firstly, unplug it from the motherboard. Then, carefully unscrew it. Lastly, lift it off the CPU. Be gentle. After all, you don’t want to damage the CPU.
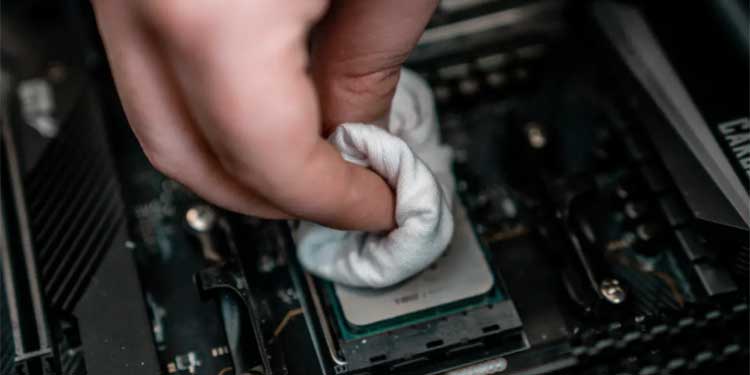
3. Applying thermal paste is the next step.
Firstly, clean off any old paste from the CPU. Then, apply a small dot of new paste. It should be in the center of the CPU. Generally, a pea-sized amount is enough.
Read more about HOW TO APPLY THERMAL PASTE ON A CPU?
4. Now, mount the radiator and fans.
Firstly, decide where to place them. Then, screw them in place. Importantly, make sure they fit properly. Also, ensure the fans are facing the right direction.
Following this, attach the pump to the CPU. Firstly, remove the plastic cover from the pump. Then, place it on the CPU. Secure it with the provided screws. Make sure it’s tight. However, don’t over-tighten it.

5. Next, connect the cooler to power and the motherboard.
Firstly, plug the fans into the CPU fan header on the motherboard. Then, connect the pump power cable. Lastly, connect any RGB cables, if present.
Post-installation checks are equally important. Firstly, make sure everything fits properly. Then, check all connections. They should be secure. Additionally, ensure the cooler doesn’t obstruct other components.
6. Now, boot up your PC.
Look for the BIOS screen. It should display the CPU temperature.
- Enter BIOS/UEFI settings: As your computer starts up, you’ll need to press a specific key to enter the BIOS or UEFI settings. This key varies depending on your computer’s manufacturer, but it’s typically the Delete or F2 key. You’ll have to press this key before your operating system begins to load.
- Find the CPU temperature readout: Once you’re in the BIOS or UEFI settings, look for a section that displays your computer’s hardware status. This is often labeled as “PC Health Status,” “H/W Monitor,” or something similar. In this section, you should see a readout of your CPU temperature.
If it’s within normal range, you’re good to go. However, if it’s high, you may need to recheck your installation.
In conclusion, installing an AIO cooler may seem daunting. However, with careful steps, it’s quite manageable. Remember, it’s okay to take your time. After all, the goal is to get it right.
Conclusion
In conclusion, knowing how to install an AIO CPU cooler is a valuable skill for any PC enthusiast. Not only does it allow you to take advantage of the superior cooling that AIOs offer, but it also provides the satisfaction of upgrading your PC yourself. With this detailed guide, you should now have the confidence to install an AIO cooler and enjoy the benefits it brings. Remember, each cooler and PC build is unique, so always refer to your specific cooler’s manual for any additional instructions.
Volta PC is an excellent resource for all your PC building needs. Not only does it offer a wide range of CPU coolers from top brands, but it also provides the opportunity to customize your PC according to your needs. Whether you’re a seasoned PC builder or just starting out, Volta PC makes it easy to find the right parts for your build. With a user-friendly website and a team of experts ready to help, you’re sure to find the perfect components for your next PC project at Volta PC.