1. What is XMP?
XMP, or extreme memory profile, is a feature for DDR3, DDR4 & DDR5 RAM modules that allow users to tweak the correct speed, timing, and voltage settings for the associated RAM. It’s a form of automated overclocking technology that enables motherboards to configure memory settings above the factory preset levels. Ram modules will run at an industrial-specific group, meaning you can purchase and install a DDR4-3200 ram module, which will only run at 2400/2666MHz. Using the XMP function will allow it to perform at higher speeds for which you paid the extra money.
Many things affect Ram’s Speed. DDR level (Double Data Rate Random Access Memory), channel/latency timing, and voltage settings are examples, and they differ for different brands and models.
While it is undoubtedly difficult for most users to know how to set the correct RAM settings in BIOS before powering up or during resets, the manufacturers store these settings information into the RAM during manufacture, such that the user can load up the correct XMP profile once in BIOS.
XMP profiles are stored on the memory module and can be loaded into the BIOS. If you are asking yourself: “Should XMP be enabled?” The answer is yes! Enabling XMP has been made easy as motherboards now include support for XMP, so if you want to get the most out of your RAM, you need to enable extreme memory profile (XMP).
2. What are the benefits?
XMP modules are designed to run at speeds beyond the standard DDR3, DDR4, and DDR5 specifications, providing enhanced performance for gaming and other demanding applications. XMP modules are more stable and reliable than manual overclocking, making them ideal for high-end systems.
While XMP modules are incompatible with all motherboard architectures, they provide significant benefits for those supporting them. XMP modules are available in various speed grades, allowing users to select the module that best meets their needs; for gamers and other power users, XMP modules offer an easy way to boost system performance.
3. How to enable XMP on your motherboard?
Enabling XMP is a reasonably straightforward process, but there are a few things you need to know before you get started. If you are looking to buy a gaming computer, chances are XMP is not enabled yet, the same goes for those who built a custom gaming PC themselves.
- Make sure your motherboard supports XMP. Most motherboards released in the last few years will support XMP, but it’s always best to check the manufacturer’s website to be sure. (Both Intel and AMD motherboards support XMP)
- Check your RAM’s documentation to see what its maximum safe frequency is once you’ve done that, you’re ready to enable XMP.
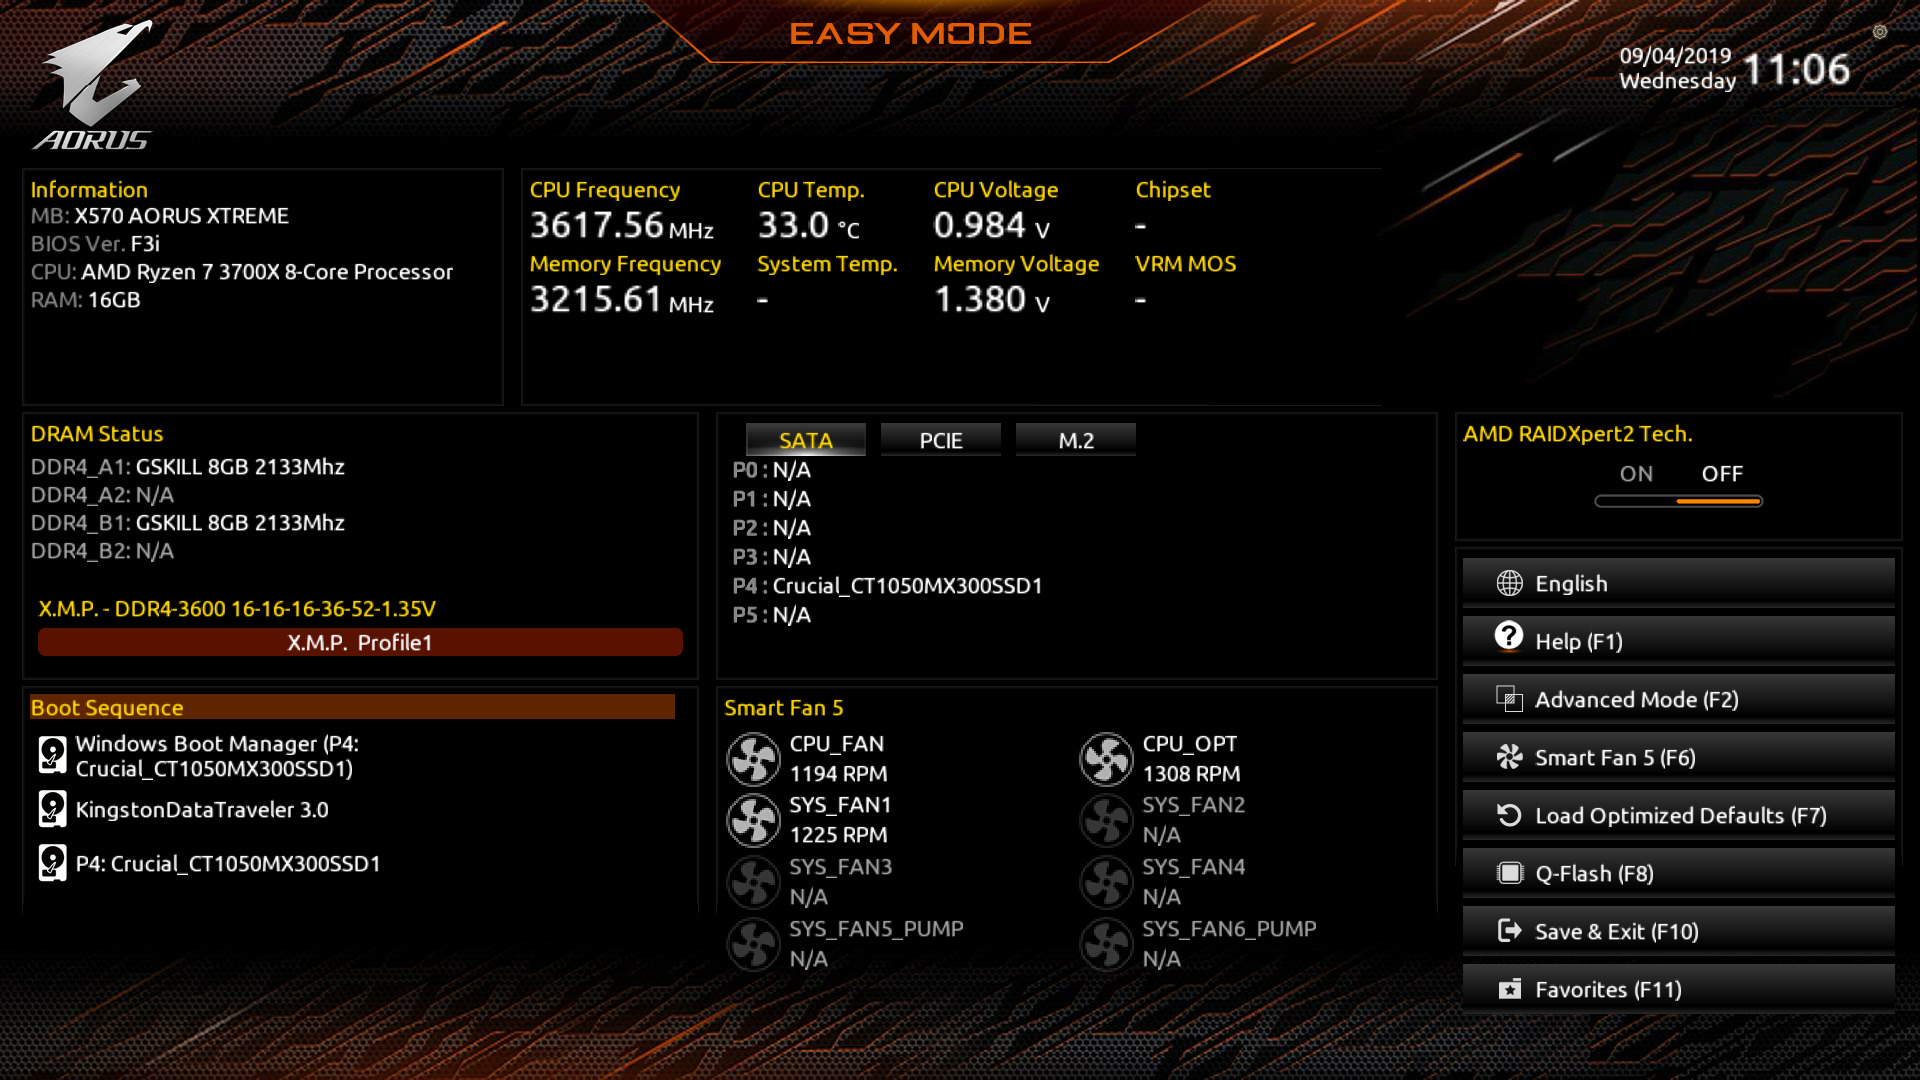
To enable XMP, go into your BIOS settings and look for the extreme memory profile option. Most motherboards will have this feature built-in (BIOS), but if yours doesn’t, you can usually enable it by downloading a BIOS update from the manufacturer’s website.
Getting into BIOS to enable XMP
Step 1: Reboot your PC and wait for the splash screen to appear
(Splash Screen = Graphic logo of motherboard manufacturer)
Step 2: At the bottom, there should be instructions to enter the BIOS, usually done by pressing either the delete key, escape key, or one of the function keys.
Step 3: Once you’ve found the XMP profile, select enable and reboot your computer. You should now see an improvement in your RAM speed. If you don’t, ensure you’ve installed the latest BIOS update for your motherboard. (You can check the speed difference by checking the Memory Frequency in bios or any software that shows performance, even task manager!)
If you are still unsure, you can check out our short Youtube reel here: https://youtube.com/shorts/XGxfeCsA-hs?feature=share