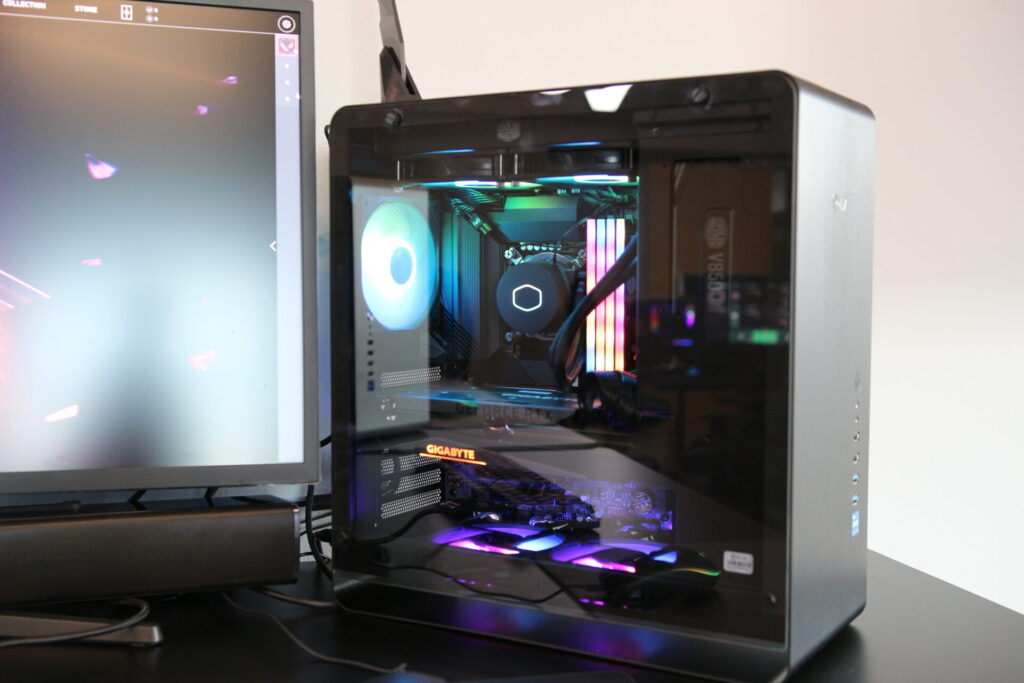
Building a custom PC can be a rewarding experience, especially when it comes to installing key components like the CPU and cooler. This step-by-step guide is designed to help you navigate through the intricacies of installing a CPU and its cooling system in your custom PC build. Whether you’re assembling a high-performance gaming rig or a powerful workstation, understanding the proper installation process is crucial for optimal performance and longevity of your components.
Key Takeaways:
- Proper installation of a CPU and cooler is essential for the performance and longevity of a custom PC.
- Understanding different CPU socket types and cooler compatibility is crucial before beginning the installation.
- Applying thermal paste correctly and ensuring the cooler is securely mounted are key steps in the process.
- Cable management and correct cooler orientation contribute to both aesthetics and airflow efficiency.
- Performing a post-installation check, including a stress test, ensures everything is functioning as expected.
1. Preparing for CPU Installation
Gathering Necessary Components
Before diving into the assembly of your custom PC, it’s crucial to have all the necessary components at hand. Ensure you have a compatible CPU, motherboard, and the right tools for the installation process. A well-prepared workspace is key to a smooth building experience.
- CPU (Central Processing Unit)
- Motherboard with the appropriate CPU socket
- CPU cooler (air or liquid)
- Screwdriver (magnetic tip recommended)
- Anti-static wrist strap
Once you have all the components, lay them out in your workspace, ensuring that everything is easily accessible. This will streamline the installation process and help prevent any unnecessary interruptions.
Understanding CPU Socket Types
When building a custom PC, it’s crucial to understand the different CPU socket types as they determine the compatibility between the motherboard and the processor. Intel primarily uses the LGA socket type, where the pins are located on the socket, requiring careful placement of the CPU. AMD, on the other hand, utilizes both PGA, where the CPU itself has pins, and LGA for their high-end Threadripper CPUs.
Here’s a quick reference for some common CPU socket types and their corresponding processors:
- Intel LGA 1200: Compatible with 10th and 11th Gen Intel Core processors
- AMD AM4: Supports AMD Ryzen and 7th Generation A-series/Athlon processors
- Intel LGA 1700: Designed for 12th Gen Intel Core processors
- AMD AM5: Future-ready socket for upcoming AMD processors
High-end processors, like Intel’s Cascade Lake or AMD’s EPYC, offer advanced features like enhanced security, virtualization support, and large memory caches. These features are essential for tasks that demand high processing power and multitasking capabilities. Entry-level CPUs, with lower core counts, are more suitable for basic computing needs.
Safety Precautions and ESD Protection
When assembling your custom PC, safety should be your top priority, especially when it comes to protecting components from electrostatic discharge (ESD). ESD can reach thousands of volts and has the potential to damage sensitive computer parts. To mitigate this risk, follow these simple steps:
- Before touching any internal components, ground yourself by touching the metal chassis of your PC case. This helps dissipate any static electricity that may have built up on your body.
- Work in an environment with minimal risk of static buildup. Avoid building on carpeted surfaces or in very dry areas.
- Consider using an anti-static wrist strap or mat, especially if you’re in an environment prone to static electricity.
Remember, while some may consider additional anti-static tools unnecessary, employing common sense and preventative measures can go a long way in protecting your investment.
2. CPU Installation Process For Custom PC
Identifying the CPU Orientation
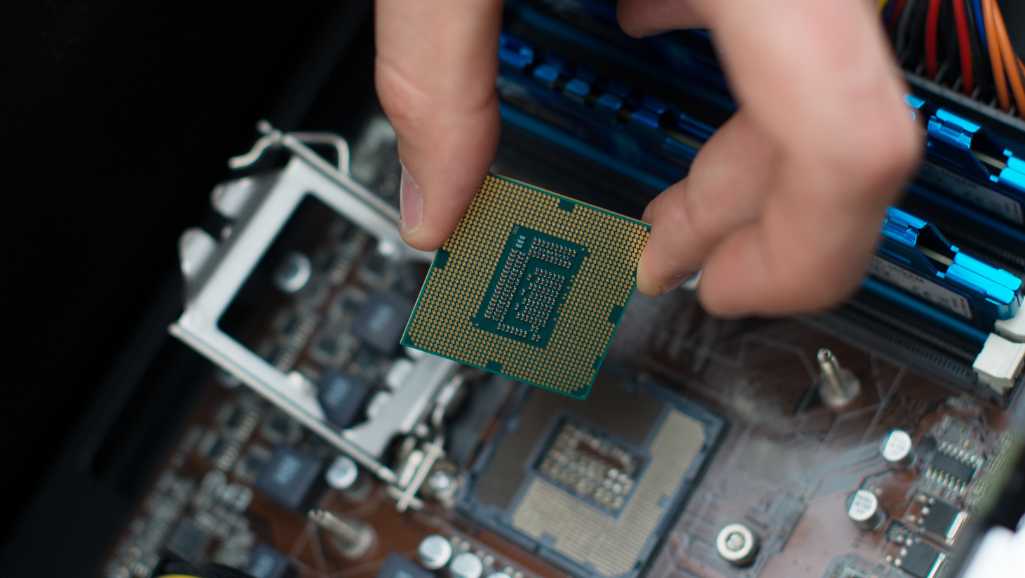
Properly orienting the CPU is crucial for a successful installation. Begin by carefully removing the CPU from its packaging, holding it by the edges to avoid any contact with the contacts on the bottom. Look for the small, golden triangle on the CPU, which corresponds to a similar marker on the socket. This is your guide for correct placement.
Align the CPU with the socket, ensuring that the markers match. The CPU should fit into the socket without any resistance. If it does not settle under its own weight, do not force it. Instead, gently lift it out and re-align. Remember, forcing the CPU can lead to damaged pins and a costly mistake.
Securing the CPU in the Socket

Once the CPU is correctly aligned with the socket, it’s time to secure it in place. Gently lower the retention bracket or lid over the CPU, ensuring it fits snugly without forcing it. Carefully press down the tension lever or arm to lock the CPU into the socket. You should hear a distinct click or feel a snap indicating that the CPU is securely fastened.
Finally, remove the socket’s protective cover if it hasn’t been done already. This is typically the last step before proceeding to install the cooling solution. Remember, applying too much pressure can be harmful, so use just enough force to engage the locking mechanism without bending any pins or damaging the CPU.
Troubleshooting Common Installation Issues
When encountering issues after installing the CPU, it’s crucial to methodically assess each component’s installation. The most common issue is an improperly or insecurely installed CPU, which can prevent the system from turning on. To address this, reseat the CPU, ensuring it aligns correctly with the socket and is locked in place.
- Check that the CPU and memory are compatible with the motherboard.
- Verify that all components, including RAM and storage, are securely connected.
- Use a single memory module or storage drive to pinpoint any faults.
- Attempt different memory slots or storage ports to rule out hardware defects.
Lastly, ensure that the BIOS settings are correct for your installation type, especially if you’re using a UEFI-enabled platform. If problems persist, consider the possibility of defective components, which may require replacement.
3. Choosing the Right CPU Cooler
Air vs. Liquid Cooling Systems
Choosing between air and liquid cooling systems is a critical decision in building a custom PC. Air cooling systems are generally more straightforward to install and cost-effective. They work by using a combination of heatsinks and fans to dissipate heat away from the CPU. However, they can be less efficient in tight spaces where airflow is restricted.
Liquid cooling systems, on the other hand, use a coolant to transfer heat from the CPU to a radiator, which is then cooled by fans. This method can be more efficient, especially for high-performance components that generate a lot of heat. The trade-off is that liquid cooling systems are typically more complex to install and can be more expensive.
Here’s a quick comparison to help you decide:
- Air Cooling: Easier installation, cost-effective, dependent on case airflow.
- Liquid Cooling: Better cooling efficiency, less dependent on airflow, higher cost, more complex installation.
Remember, the choice between air and liquid cooling should align with your performance needs, budget, and whether you’re aiming for a particular look within your case.
Compatibility with CPU and Case
Ensuring that your CPU cooler is compatible with both your CPU and computer case is crucial for a successful build. Compatibility issues can lead to inadequate cooling or even prevent the cooler from fitting inside the case. Before purchasing a cooler, verify that it supports the socket type of your CPU. For instance, Intel’s 14th gen CPUs may require coolers compatible with Z790, Z690, B760, and B660 chipsets, while AMD’s high-end Ryzen CPUs might need coolers that work with B650 or X670 chipsets.
When considering case compatibility, measure the available space for the CPU cooler. This includes checking the maximum CPU cooler height that the case can accommodate. Air coolers, in particular, can vary significantly in size, and it’s essential to have a few millimeters of clearance above the cooler for proper airflow.
Lastly, review the case specifications to ensure it has adequate mounting points for the cooler and that the cooler’s dimensions do not interfere with other components, such as RAM modules or graphics cards. Here’s a quick checklist to help you verify compatibility:
- Confirm the cooler supports your CPU’s socket type.
- Check the maximum cooler height allowed by your case.
- Ensure the cooler does not obstruct other components.
- Review the case’s mounting points for the cooler.
- Consider the ease of installation and future upgrades.
Reading Cooler Specifications
When selecting a CPU cooler, it’s crucial to understand the specifications that will ensure compatibility and optimal performance for your system. The Thermal Design Power (TDP) rating is a key specification; it indicates the maximum amount of heat the cooler is designed to dissipate and should match or exceed the TDP of your CPU to prevent overheating.
Coolers come in various forms, such as air cooling and liquid cooling, each with their own set of specifications. For instance, air coolers are categorized into tower-style, downdraft, and updraft based on their design and airflow direction. It’s essential to choose a cooler that not only aligns with your cooling needs but also fits physically within your case.
4. Installing the CPU Cooler
Attaching the Backplate
Before proceeding with the cooler installation, attaching the backplate is a crucial step. The backplate provides the necessary support for the cooler and ensures that the weight is evenly distributed across the motherboard. Begin by locating the backplate that matches your CPU socket type, such as AM4 or LGA 1200. It’s essential to align the backplate correctly with the motherboard’s holes.
After positioning the backplate, proceed to install the mounting posts. These should be screwed in finger tight to avoid damaging the motherboard. Here’s a simple checklist to ensure a proper backplate installation:
- Align the backplate with the motherboard’s mounting holes.
- Secure the backplate using the appropriate hardware.
- Verify that the backplate is firmly in place and not obstructing any other components.
Applying Thermal Paste
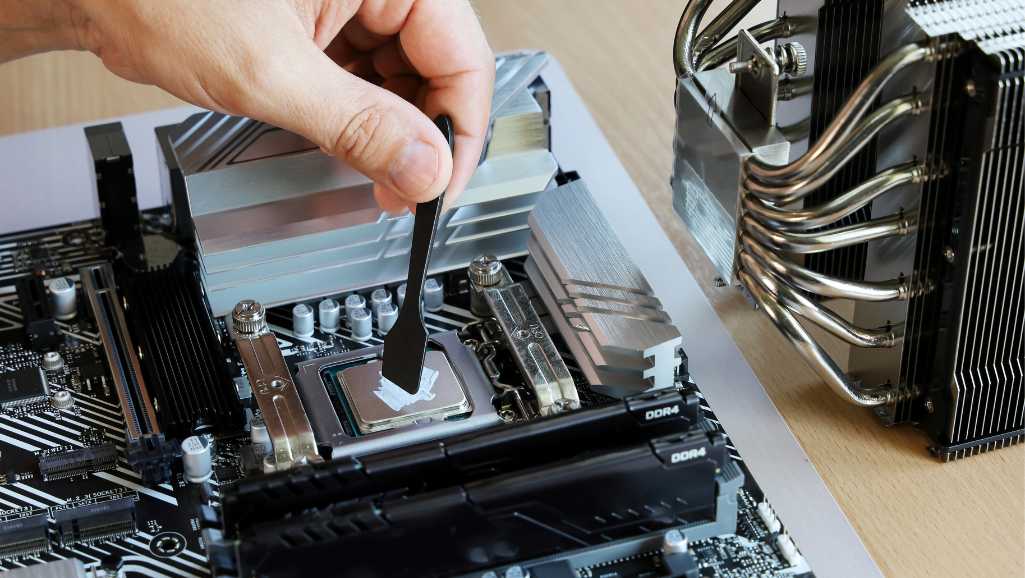
Proper application of thermal paste is crucial for efficient heat transfer from the CPU to the cooler. Begin by applying a small dot—no larger than a grain of rice or a pea—in the center of the CPU. Avoid using too much paste, as excess can spill over the edges and potentially cause damage.
Here are some additional tips:
- Start with a small amount on a scrap paper to check the consistency.
- If the cooler has pre-applied paste but you wish to use your own, clean the old paste with 90% isopropyl alcohol and a lint-free cloth.
- Tighten the cooler screws evenly to avoid uneven pressure that could damage the CPU or affect cooling performance.
Remember, the goal is to create a thin layer that covers the CPU die completely without overflowing. This ensures optimal thermal conductivity and prevents any potential issues with paste entering the socket.
Mounting the Cooler and Connecting Fans
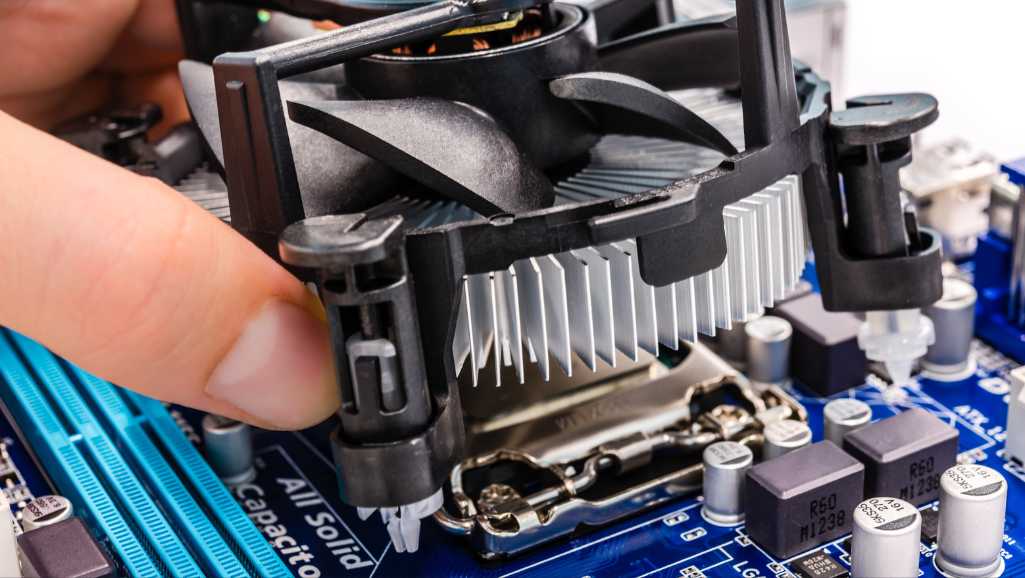
With the cooler securely attached, it’s time to connect the fans. Ensure that the fan cables are routed towards the motherboard to avoid any obstruction and to maintain a clean setup. For a liquid AIO cooler, use long screws to attach the fans and radiator to the case, aligning all the holes and fully installing one screw with the radiator properly placed before moving on to the others.
Finally, connect the fan or pump cables to the appropriate headers on the motherboard. These are typically labeled as CPU_FAN, CPU_AUX, or CPU_PUMP. Consult your motherboard’s manual to locate these headers. If your cooler has multiple fans, make sure to connect each one, ensuring your system receives adequate cooling.
5. Finalizing the CPU and Cooler Setup for Custom PC
Ensuring Proper Cooler Orientation
Proper orientation of the CPU cooler is crucial for optimal cooling performance. Ensure that the airflow direction is aligned with the case’s exhaust fans, typically towards the back or top of the case. This setup allows for efficient heat dissipation and maintains a consistent cooling path within the system.
When attaching the cooler, be mindful of the airflow intake and exhaust sides. The intake usually faces the open side of the fan, while the exhaust is on the frame side. Look for arrows on the fan’s edge to confirm the airflow direction.
Here are some general steps to follow:
- Locate the alignment mark or notch on the cooler and the mounting bracket.
- Align the cooler with the mounting bracket, ensuring it fits snugly without forcing it.
- Mount the fan on the cooler so that it blows air through the fins, not just pulling air through.
Remember, the correct orientation of the cooler and fans can significantly impact the cooling efficiency and overall system performance. Always refer to the cooler’s instruction manual for specific mounting instructions.
Cable Routing for Optimal Airflow
Proper cable management is crucial for maintaining optimal airflow within your PC case. Route cables away from the main airflow paths to prevent any obstruction to the cooling process. This includes the area around the CPU cooler, the graphics card, and any case fans. By doing so, you ensure that cool air can freely circulate over your components, keeping them at lower temperatures.
For the PCI Express cables, guide them through the nearest entry point to the edge of your graphics card. This preliminary placement puts them close to their final destination, allowing for easier adjustments later on. Remember to allow some slack and avoid bending cables too sharply, as this can cause damage or disconnection issues.
Finally, use zip ties or Velcro straps to secure cables and eliminate excess slack. This not only contributes to a cleaner look but also prevents cables from sagging or interfering with other components. Here’s a quick checklist to ensure you’ve covered the essentials of cable routing:
Performing a Post-Installation Check
After securing the CPU and cooler, it’s crucial to verify that all components are functioning correctly. Boot into the BIOS to ensure that the system recognizes all installed hardware. This includes checking that all fans are operational and that the BIOS displays the correct CPU name, the presence of the CPU cooler, and the full amount of installed memory.
Perform a preliminary test run before finalizing the installation in the chassis. This involves temporarily installing the GPU, connecting all necessary power cables, and initiating a power-on self-test (POST). If the system successfully POSTs, you’ll see the motherboard’s logo on the connected display.
Once you’ve confirmed that the system is functioning as expected, you can proceed with installing the operating system and drivers, followed by performance testing and optimization.
Conclusion
Assembling your custom PC can be a rewarding experience, especially when it comes to the critical steps of installing the CPU and cooler. By following the detailed guide, you’ve learned how to properly seat your processor and ensure it stays cool under load with the appropriate cooling solution.
Whether you’ve chosen air or liquid cooling, the key is in the careful handling and adherence to the manufacturer’s instructions. Remember, the CPU is the brain of your PC, and the cooler is its first line of defense against overheating. With these components now expertly installed, you’re well on your way to completing your custom build and enjoying the performance benefits of your handcrafted system. Happy building!
Frequently Asked Questions
How do I choose the right CPU cooler for my custom PC?
Select a CPU cooler that matches your CPU’s power and size, as well as the clearance and compatibility with your case and motherboard. Consider the type of cooler, such as air or liquid, based on your cooling needs and budget.
What safety precautions should I take when installing a CPU?
Ensure you’re working in a static-free environment, use an antistatic wrist strap, handle the CPU by the edges, and avoid touching the pins or contacts.
How do I know if my CPU is properly seated in the socket?
The CPU should fit snugly without force, and the alignment notches should match the socket. Once seated, the retention arm should lock the CPU in place without resistance.
Do I need to apply thermal paste before installing the CPU cooler?
Yes, applying a pea-sized amount of thermal paste on the center of the CPU ensures efficient heat transfer from the CPU to the cooler.
How can I prevent my CPU from overheating?
Use a quality CPU cooler, apply thermal paste correctly, ensure good case airflow, and regularly clean dust from your PC components.
What are the common issues when installing a CPU cooler?
Common issues include incorrect cooler orientation, improper thermal paste application, and inadequate mounting pressure, which can lead to overheating.
How do I install a cooler’s backplate on the motherboard?
Align the backplate with the motherboard’s mounting holes, following the cooler’s manual for proper installation. Secure it with the provided screws or clips.
Can I reuse my old CPU cooler for a new build?
You can reuse a CPU cooler if it’s compatible with the new CPU and motherboard. However, you should replace the thermal paste and ensure the cooler’s efficiency hasn’t degraded.
Ready to Level Up Your Custom PC in Singapore?
Tired of a PC that stutters and lags instead of keeping pace with you? Dreaming of a rig that makes your games come alive? VOLTA PC is your one-stop solution.
Need the latest, blazing-fast CPU for your custom PC in Singapore? We’ve got it.
Want a custom-built masterpiece? We’ll design it together.
Unsure how to upgrade? Our experts will guide you every step of the way.
Don’t settle for less – transform your PC experience with VOLTA PC. Reach out now and let’s get started!