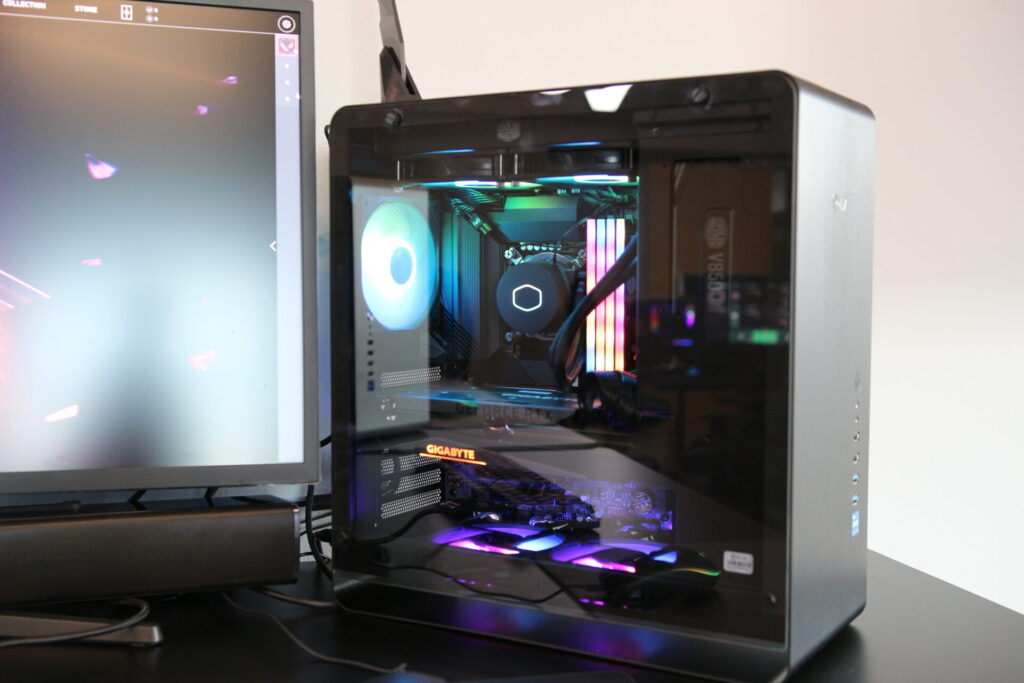
Maintaining your GPU is crucial to ensuring its longevity and optimal performance, especially if you’re an avid gamer or a professional relying on graphic-intensive applications. Among the most critical components of GPU maintenance is the management of its thermal interface material, commonly known as thermal paste. This seemingly simple compound plays a pivotal role in heat management within your GPU, making the difference between a smoothly running system and one prone to overheating.
So, what exactly is thermal paste? Thermal paste is a thermally conductive chemical compound that fills the microscopic imperfections on the surfaces of the CPU or GPU and its heat sink, enhancing the heat transfer between the two components. Over time, however, thermal paste can degrade, lose its effectiveness, and lead to increased temperatures and decreased performance. Recognizing when it’s time for a GPU thermal paste replacement and knowing how to do it correctly can save you from potential damage and costly repairs.
In this comprehensive guide, we’ll walk you through everything you need to know about replacing the thermal paste on your GPU. From identifying the signs that it’s time to replace your paste, to selecting the right products, and providing you with a detailed, step-by-step replacement process, this post has got you covered. Let’s dive into the first critical aspect: recognizing the signs that your GPU thermal paste needs a replacement.
Signs That You Need GPU Thermal Paste Replacement
Recognizing when to replace your GPU thermal paste is key to preventing thermal damage and maintaining peak performance. Here are the primary signs that indicate your thermal paste might be due for a replacement:
1. High Operating Temperatures
One of the most obvious signs of failing thermal paste is an increase in GPU temperatures. If you notice that your GPU is consistently running hotter than usual during normal operations or gaming sessions, it could be a sign that the thermal paste is no longer effective. Using software tools to monitor your GPU’s temperature can help you track these changes accurately.
2. Thermal Throttling
When a GPU overheats, it may reduce its clock speed to lower the temperature, a process known as thermal throttling. If you experience sudden drops in performance, especially during tasks that were previously handled smoothly, it might indicate that your GPU is throttling due to inadequate heat transfer.
3. System Crashes and Instability
Excessive heat can lead to system instability, crashes, or even the dreaded blue screen of death. If these issues become frequent and coincide with high GPU temperatures, deteriorating thermal paste could be a contributing factor.
4. Age of the GPU
Thermal paste doesn’t last forever. As a rule of thumb, if you’ve been using your GPU for several years and have never replaced the thermal paste, it might be time to do so. Over time, thermal paste can dry out and become less effective, even if the GPU isn’t showing immediate signs of overheating.
5. Noisy Fan Operations
An increase in fan noise or fans running at high speeds more frequently than usual can also be a sign that your GPU is struggling to keep cool. While this doesn’t always mean that the thermal paste is the culprit, it’s a common symptom of thermal issues within the GPU.
Recognizing these signs early can help you take timely action and prevent more severe issues with your GPU. With the right approach, replacing your GPU thermal paste can be a straightforward and rewarding process, ensuring that your hardware performs well and stays cool under pressure.
Preparing for GPU Thermal Paste Replacement
Replacing the thermal paste on your GPU is a delicate process that requires careful preparation. Here’s how to get ready for the task to ensure a smooth and safe thermal paste replacement.
1. Gather Necessary Tools and Materials
Before you begin, make sure you have all the necessary tools and materials at hand. Here’s a list of what you’ll need:
Non-conductive Thermal Paste: Choose a high-quality thermal paste that is non-conductive to avoid any risk of electrical shorts.
Isopropyl Alcohol (at least 70%): This will be used to clean the old thermal paste off the GPU die and cooler.
Microfiber Cloth or Lint-Free Wipes: To help clean the surfaces without leaving residues.
Plastic Spudger or Credit Card: For spreading thermal paste or prying, if necessary.
Screwdrivers: Ensure you have the correct sizes and types to disassemble your GPU.
Thermal Pads (optional): If your GPU uses thermal pads, consider replacing these as well.
2. Safety Tips and Precautions
Handling electronic components can be risky not only for the components but also for you. Here are some safety tips:
Ground Yourself: Prevent static electricity from damaging the GPU by grounding yourself with an anti-static wrist strap or by frequently touching a grounded object.
Handle Components Carefully: GPUs are sensitive to physical shocks and static. Handle your GPU and other components gently.
Keep a Clean Workspace: Make sure your work area is clean, organized, and free of any static-inducing materials like carpeting.
3. Preparing Your Workspace
A well-prepared workspace is crucial for a successful operation:
Good Lighting: Ensure your workspace is well-lit so you can see small components and connectors clearly.
Uncluttered Area: Keep unnecessary items away from your work area to avoid interference or accidents.
Organize Your Tools: Have all your tools within reach but organized to avoid knocking them over or losing them during the process.
Taking the time to prepare properly can significantly smooth the process of replacing your GPU’s thermal paste, leading to better outcomes and a lower risk of damage.
Step-by-Step Guide to Replacing GPU Thermal Paste
Replacing the thermal paste on your GPU can significantly improve its thermal performance and stability. Here’s a detailed, step-by-step guide to help you through the process.
Step 1: Disassembling the GPU
Power Down and Unplug: Ensure your computer is turned off and unplugged from any power source.
Remove the GPU: Open your PC case and carefully remove the GPU from the motherboard.
Disassemble the Cooling System: Use the appropriate screwdrivers to remove the screws on the GPU that hold the cooling system in place. Keep track of all screws and their positions.
Step 2: Cleaning Off Old Thermal Paste

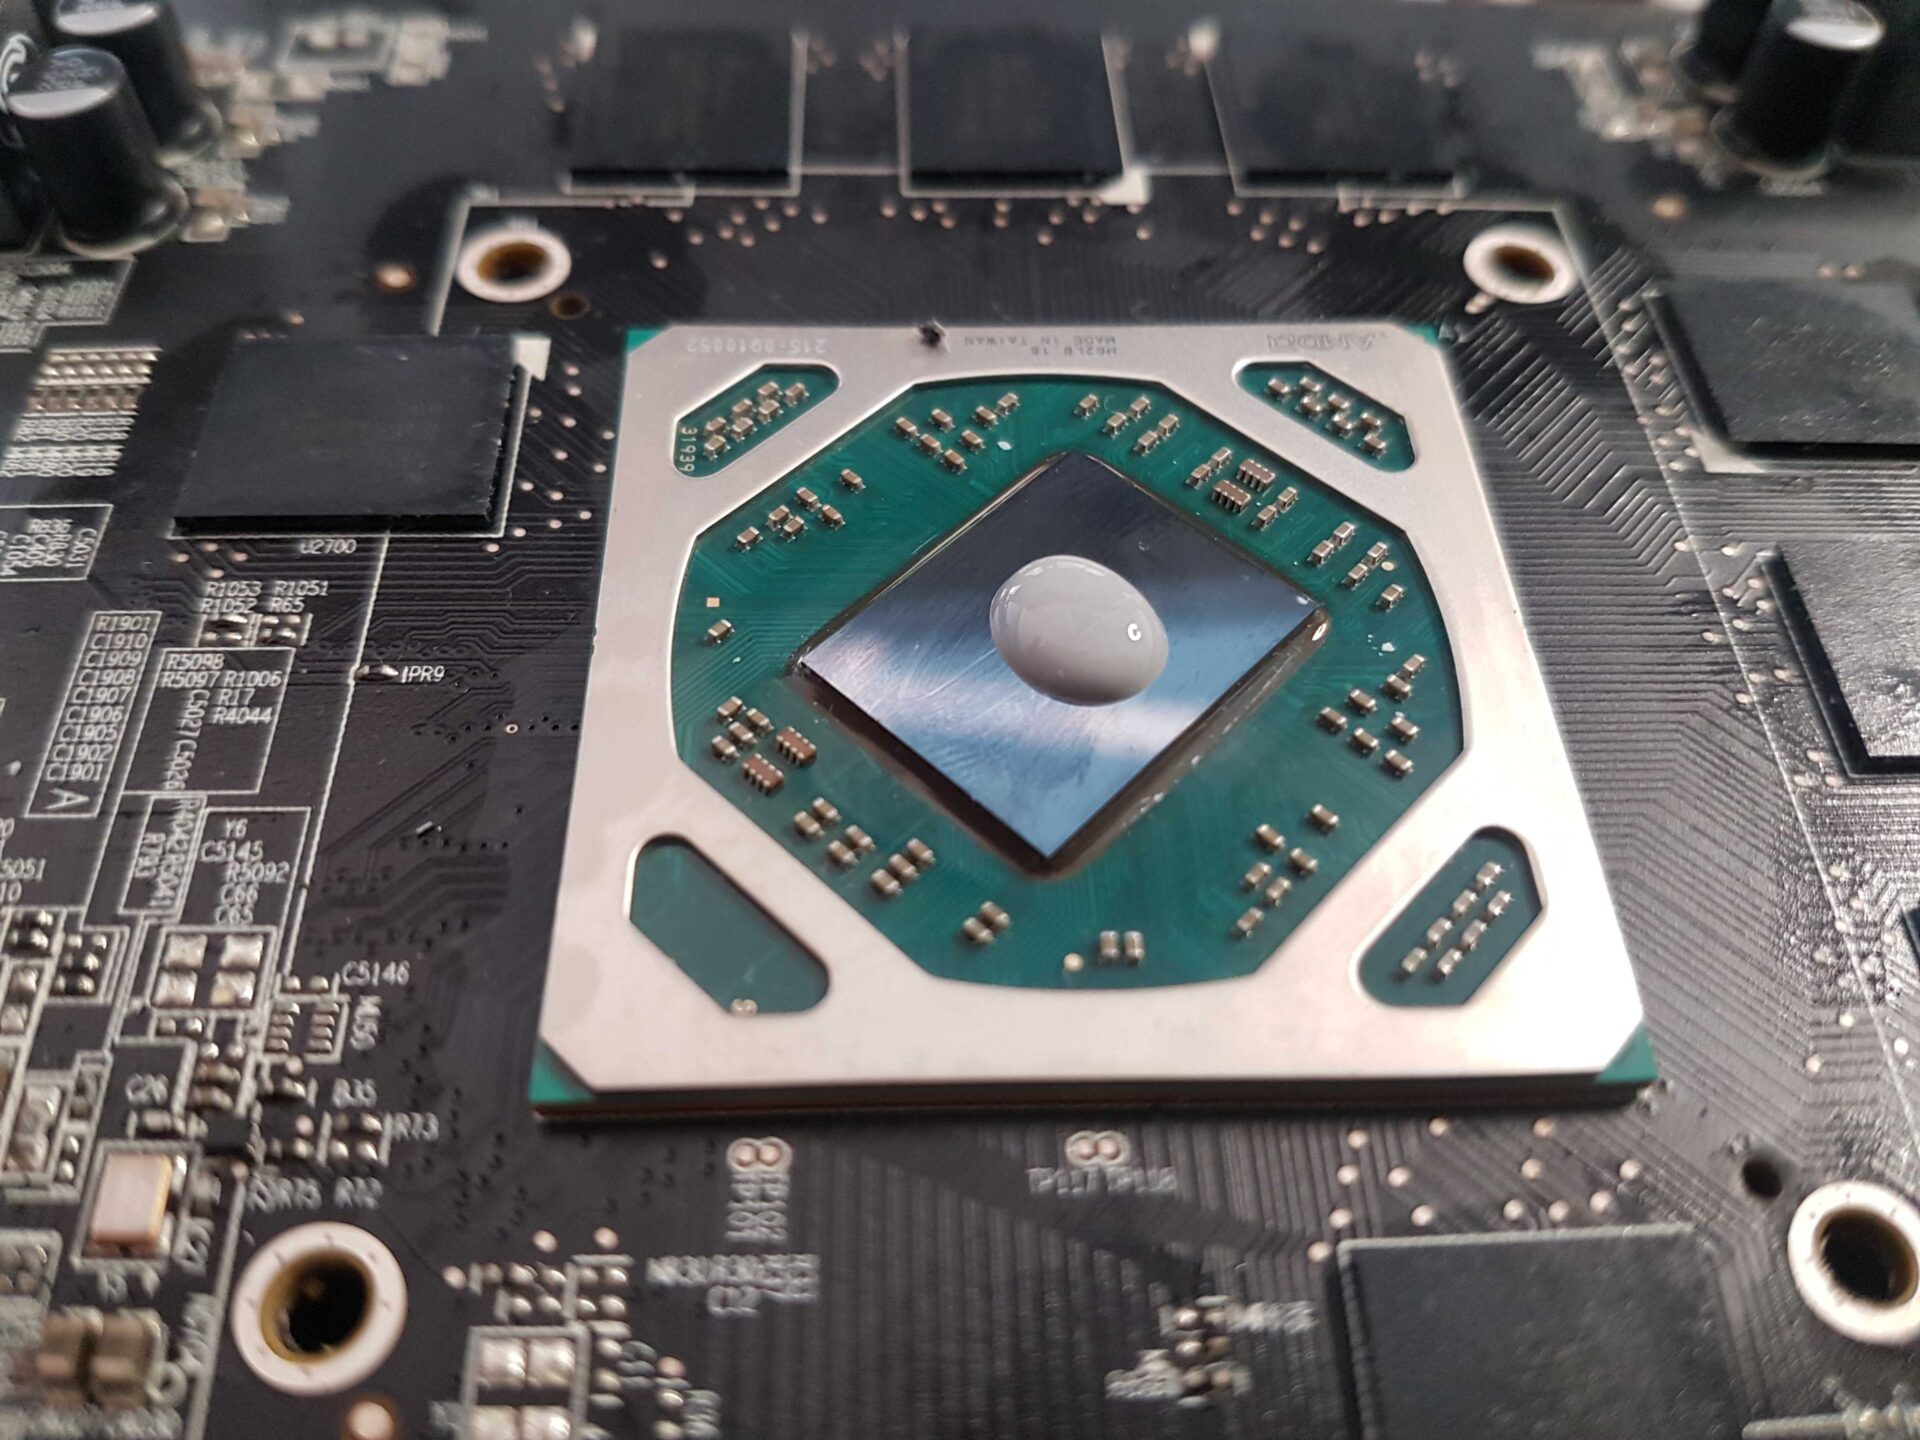
Access the GPU Die: Once the cooling system is removed, you’ll see the GPU die, which will likely have old thermal paste on it.
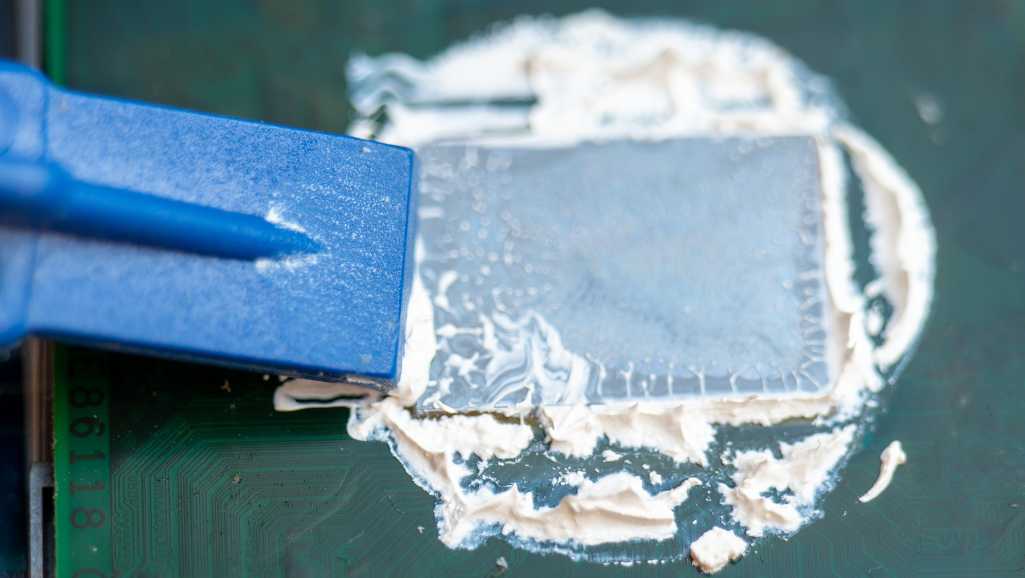
Clean the GPU Die and Cooler: Apply a small amount of isopropyl alcohol to your microfiber cloth or lint-free wipe and gently clean off the old paste from the GPU die and the cooler. Ensure all residue is removed for the best results.
Step 3: Applying New Thermal Paste
Apply the Thermal Paste: Place a small, pea-sized amount of thermal paste on the center of the GPU die. You don’t need a lot; just enough to cover the core once the cooler is reattached.
Spread the Paste (optional): Some prefer to spread the paste slightly with a plastic spudger or a card to ensure an even layer, though this step is optional as the pressure from the cooler often spreads the paste sufficiently.
Step 4: Reassembling the GPU
Reattach the Cooler: Carefully align and place the cooler back onto the GPU. Press down gently to spread the thermal paste evenly.
Screw the Cooler Back in Place: Replace the screws you removed during disassembly. It’s often best to start with the corners and work in a cross pattern to ensure even pressure distribution.
Reinstall the GPU: Once the GPU is reassembled, place it back into the motherboard slot and reattach any power connectors.
Aftercare and Testing
Once you have replaced the thermal paste and reassembled your GPU, it’s crucial to ensure that everything is functioning correctly and that the new thermal interface is effective. Here’s how to properly test your GPU after thermal paste replacement and monitor its performance.
1. Initial Testing
Boot Your System: Carefully reinsert the GPU into your computer, connect all necessary power cables, and boot up your system. Listen for any unusual noises and watch for any error messages.
Check BIOS/UEFI Settings: Enter the BIOS/UEFI settings to ensure the GPU is recognized and monitor the initial temperature readings to see if they are within a normal range.
2. Temperature Monitoring
Use Monitoring Software: Install or use existing software like GPU-Z, MSI Afterburner, or HWMonitor to check the GPU’s temperature in real-time. Compare these temperatures to those recorded before the thermal paste replacement.
Stress Testing: Perform stress tests using software like FurMark or 3DMark. Observe the temperature behavior under load and ensure it stays within safe limits.
3. Performance Benchmarks
Run Benchmarks: Use benchmarking tools to compare the GPU’s performance before and after the paste replacement. This can help verify that not only is the GPU cooler, but also performing optimally.
Check for Stability: Look for any signs of graphical glitches, crashes, or performance dips which might suggest issues with the paste application or the reassembly process.
4. Troubleshooting Common Issues
High Temperatures: If temperatures remain high, double-check your paste application and cooler mounting for any errors.
System Instability: Random crashes or performance issues may require re-evaluating the thermal paste spread or checking for other possible interference or damage during assembly.
5. Long-Term Monitoring
Regular Checks: Continue to monitor your GPU’s temperatures periodically, especially during high-performance tasks. This can help catch any future degradation in thermal performance.
Maintenance Reminder: Set a reminder for another thermal paste inspection and possible replacement in the future, typically every few years, depending on usage intensity.
Best Practices and Recommended Products
Ensuring optimal GPU performance extends beyond just replacing the thermal paste; it involves using the right products and techniques. Here’s a guide to some best practices and recommended products that can help you achieve the best results with your GPU thermal paste replacement.
1. Choosing the Right Thermal Paste
Selecting a high-quality thermal paste is crucial for effective heat transfer between your GPU die and the cooler. Here are some highly recommended thermal pastes:
Thermal Grizzly Kryonaut: Known for its high thermal conductivity, this paste is ideal for high-end gaming and overclocking.
Arctic MX-4: A popular choice that offers excellent performance for its price, with the benefit of being non-conductive and easy to apply.
Noctua NT-H1: Another excellent choice that provides reliable thermal performance with no curing time.
2. Application Techniques
Proper application of thermal paste is as important as the paste itself. Here are a few tips to ensure optimal application:
Pea-Sized Method: A small pea-sized amount in the center of the GPU die is generally sufficient. The pressure from the cooler will spread the paste adequately.
Cross Method (For Larger GPUs): A thin cross pattern can be effective for larger GPU dies to ensure complete coverage.
Avoid Over-application: Too much thermal paste can cause it to spill over the edges and potentially degrade thermal performance.
3. Long-Term Maintenance Tips
To keep your GPU running smoothly over the years, consider these maintenance tips:
Regular Cleaning: Dust buildup in your PC can affect cooling performance. Regularly cleaning the dust filters and fans can help maintain optimal temperatures.
Monitor Performance: Keep an eye on temperatures and performance over time. Any sudden changes could indicate issues that might need addressing.
Periodic Reapplication: Depending on your GPU usage, consider reapplying thermal paste every few years to maintain optimal thermal performance.
4. Product Compatibility
Ensure that the products you choose are compatible with your specific GPU model. Some pastes are better suited for different types of GPUs or cooling setups.
5. Where to Buy
You can find these products at most electronics and computer hardware stores, or online platforms like Amazon, Newegg, Volta PC and direct from manufacturers’ websites.
Conclusion
Maintaining your GPU’s thermal management through regular thermal paste replacement is an essential aspect of hardware care, especially for those who demand high performance from their systems. By following this detailed guide, you’ve gained the knowledge and skills necessary to perform this maintenance task effectively.
Whether you’re a seasoned gamer, a creative professional, or simply a tech enthusiast, keeping your GPU in top condition will ensure that it continues to deliver the performance you need, while also extending its useful life.
Thank you for following along, and happy tweaking!
Is it time to reapply thermal paste to your GPU, or are you considering an upgrade? Contact VOLTA PC for expert advice and top-notch services tailored to your needs. Enhance your gaming or professional rig today with help from our knowledgeable team. Contact VOLTA PC for all your GPU needs!