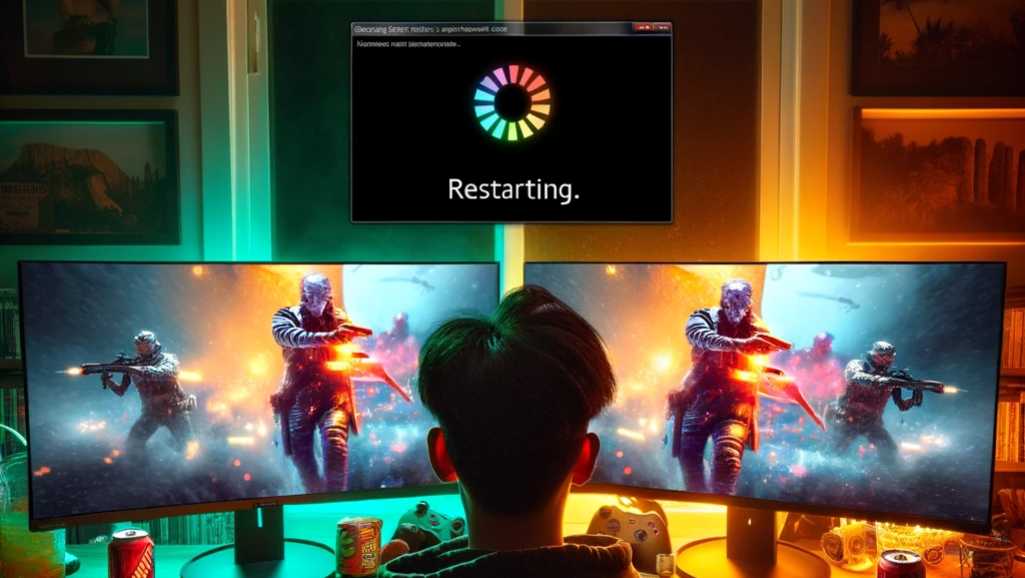
Encountering a sudden restart on your gaming PC during an intense gameplay session can be immensely frustrating. Understandably, this issue has perplexed and annoyed many gamers around the world. In this guide, we delve deep into the problem of gaming PC restart during gameplay. Our aim is to provide you with a holistic understanding and practical solutions.
Now, you might wonder, why does this issue warrant such attention? For gamers, stability and performance are paramount. A sudden restart not only disrupts the gaming experience but can also lead to loss of progress in the game. Moreover, it raises concerns about the health and longevity of the PC components.
In this comprehensive blog post, we are not just providing a list of quick fixes. Instead, we are offering a user-friendly guide that educates you on the underlying causes and various solutions. Additionally, we will explore preventive measures to avoid such issues in the future. Our unique approach ensures that you are well-equipped to handle and prevent gaming PC restart during gameplay.
By the end of this guide, you will have a thorough understanding of why these unexpected restarts occur. Furthermore, you will know how to diagnose, fix, and prevent them. So, let’s embark on this journey together and put an end to the frustrating gaming interruptions once and for all.
Understanding the Problem
When you’re deeply immersed in your favorite game, the last thing you want is an unexpected interruption. Yet, many gamers face the issue of their gaming PC restart during gameplay. This problem is not only annoying but also puzzling. So, let’s break it down and understand what’s really going on.
Firstly, it’s crucial to recognize the symptoms.
The gaming PC might restart without any warning or error message. In some cases, the system might freeze for a moment before restarting. These symptoms indicate that something is amiss. But what could be causing this?
There are several potential culprits behind these unexpected restarts.
Power supply issues are a common cause. If the power supply unit (PSU) isn’t providing enough power, the system might restart. Overheating is another major factor. When the CPU or GPU gets too hot, the system protects itself by restarting.
Software and driver issues can also lead to restarts.
Outdated or corrupt drivers might be the problem. Additionally, hardware malfunctions, such as faulty RAM or a failing motherboard, could be the cause. It’s important to note that these are just a few of the potential causes.
Now, let’s delve a bit deeper into each of these areas.
Power supply issues can be tricky to diagnose. However, a PSU that’s not providing sufficient power is a common issue. Especially if you’ve upgraded your system with new, more powerful components. These new components might require more power than your PSU can provide.
Overheating is a problem that’s easier to spot.
Modern CPUs and GPUs have built-in temperature monitoring. You can use software tools to check the temperatures of your components. If they’re running too hot, that could be the cause of the restarts.
Software and driver issues are another area to investigate.
Ensure that all your drivers, especially your graphics card driver, are up to date. Outdated drivers can cause a variety of issues, including unexpected restarts. Hardware malfunctions are less common, but they can be the cause of the problem. Faulty RAM, in particular, is a known culprit.
Diagnosing the Issue
Diagnosing the issue of a gaming PC restart during gameplay is a crucial step. It helps in identifying the root cause of the problem. In this section, we will walk through the process, step by step. By the end, you should have a clearer understanding of what might be causing the restarts.
First off, start by checking the Event Viewer in Windows.
The Event Viewer is a powerful tool integrated into Windows operating systems. It plays a crucial role in system diagnostics and troubleshooting. When your gaming PC restarts unexpectedly during gameplay, the Event Viewer can be your ally in figuring out what went wrong.
How Event Viewer Works
Event Viewer logs a wide array of event types. These include information messages, warnings, and critical errors. Each event type serves a specific purpose:
1. Information Messages: These events indicate normal operations and successful completions of actions.
2. Warnings: These are events that aren’t necessarily errors but could be indicative of potential issues.
3. Critical Errors: These events signify serious problems that have occurred on your system.
When your gaming PC restarts unexpectedly, you should focus on warnings and critical errors. These events can provide clues about what caused the restart.
Finding Relevant Events
To use Event Viewer effectively:
1. Open Event Viewer by typing “Event Viewer” in the Windows search bar and selecting the app.
2. Navigate to “Windows Logs” and then “System”.
3. Look for events that occurred just before the restart. Pay attention to the time and date stamps.
4. Focus on events marked as “Error” or “Critical”.
Analyzing the Events
Once you’ve located the relevant events, it’s time to analyze them:
1. Click on an event to view its details.
2. Look for information in the “General” and “Details” tabs. These tabs provide specifics about the event.
3. Take note of any error codes or descriptions. These can be invaluable for troubleshooting.
Identifying Patterns
As you analyze the events, look for patterns:
– Are there specific errors that occur consistently before a restart?
– Do the errors relate to a particular hardware component or driver?
– Are there any recurring themes in the error descriptions?
Identifying patterns can help pinpoint the cause of the restarts. It can guide you on what to fix or update to resolve the issue.
Next, monitor your system’s temperatures.
Overheating in gaming PCs can occur when the CPU (Central Processing Unit), GPU (Graphics Processing Unit), or other critical components get too hot. This excessive heat can cause the system to become unstable, leading to unexpected restarts. These restarts are a protective measure to prevent permanent damage to the hardware.
Why Overheating Occurs
Overheating can happen for a variety of reasons:
1. Inadequate Cooling: If the cooling solutions (fans, heatsinks, liquid cooling systems) are not sufficient for the components, heat can build up.
2. Dust and Debris: Accumulation of dust in fans and heatsinks can obstruct airflow, reducing cooling efficiency.
3. Poor Ventilation: Lack of proper airflow in and out of the PC case can trap hot air inside.
4. High Workload: Intensive gaming sessions put a lot of stress on the CPU and GPU, generating more heat.
Additionally, it’s wise to check the power supply unit (PSU).
The PSU plays a crucial role in the stability and performance of your gaming PC. It converts the electrical power from your outlet into a usable form for the computer, distributing it to the CPU, GPU, motherboard, and other components. Each of these components requires a specific amount of power to operate optimally.
Signs of a Failing or Inadequate PSU
A failing or inadequate PSU can manifest in several ways:
– Unexpected Restarts: Your PC may suddenly restart, particularly during power-intensive tasks such as gaming or video editing.
– System Instability: You might experience system crashes, blue screens, or other stability issues.
– Failure to Power On: In extreme cases, the PC might not start at all.
Furthermore, consider running a memory test.
Faulty RAM is a known cause of restarts. Windows has a built-in memory diagnostic tool that you can use. It will check for errors and let you know if there are any issues with your RAM.
In some cases, the issue might be related to specific games or software.
Try playing different games and see if the problem persists. If it only happens with certain games, it might be a software-related issue. Check for game patches or updates that might fix the problem.
Moreover, take a look at your system’s settings.
Incorrect settings can sometimes lead to restarts. Ensure that your system is not set to automatically restart upon system failure. You can find this setting in the System Properties under the Advanced tab.
Lastly, don’t hesitate to seek professional help if needed.
If you’ve tried all the above steps and the issue persists, it might be time to consult with a professional. They can provide a more in-depth diagnosis and help resolve the issue.
In summary, diagnosing the issue of a gaming PC restart during gameplay requires a systematic approach. Check the Event Viewer, monitor temperatures, test the PSU, update drivers, run a memory test, and check system settings. By following these steps, you should be able to identify and resolve the issue, ensuring a smooth gaming experience.
Common Solutions and Fixes For Gaming PC Restart During Gameplay
Once you’ve diagnosed the issue, the next step is to fix it. In this section, we’ll explore common solutions and fixes for a gaming PC restart during gameplay. These solutions have worked for many, and they could work for you too.
Checking and Upgrading the Power Supply Unit (PSU)
Firstly, let’s talk about the power supply unit (PSU). It’s a critical component of your gaming PC. A PSU that’s not providing sufficient power can cause restarts. Check if your PSU is powerful enough for your system’s components. You might need to upgrade to a higher wattage PSU.
Additionally, ensure that all cables from the PSU are securely connected. Loose cables can lead to power issues. If you suspect your PSU is failing, consider replacing it. A reliable PSU is crucial for system stability.
Checking PSU Adequacy
To ensure your PSU is adequate for your system’s needs:
1. Calculate Your Power Requirements: Add up the power requirements of your CPU, GPU, motherboard, and other components. There are online calculators available that can help with this.
2. Consider Future Upgrades: If you plan to upgrade your components in the future, choose a PSU that can accommodate the increased power demand.
3. Provide Some Headroom: It’s a good practice to choose a PSU that provides more power than your system currently needs. This ensures stability and leaves room for future upgrades.
Upgrading to a Higher Wattage PSU
If your current PSU is not sufficient, you might need to upgrade:
1. Choose a Reputable Brand: Opt for a PSU from a well-known and reputable manufacturer to ensure reliability and efficiency.
2. Look for Efficiency Ratings: PSUs come with efficiency ratings (80 Plus, 80 Plus Bronze, Silver, Gold, Platinum, or Titanium). A higher efficiency rating indicates a more efficient PSU, which can contribute to system stability.
3. Ensure Compatibility: Make sure the new PSU is compatible with your PC’s form factor and has all the necessary connectors for your components.
-
 ASUS ROG LOKI SFXL 750 PLATINUM MODULAR PSU 3.0$319.00 w/GST
 -
 ASUS ROG LOKI SFXL 850 PLATINUM MODULAR PSU 3.0$359.00 w/GST
 -
 ASUS ROG LOKI SFXL 1000 PLATINUM MODULAR PSU 3.0$419.00 w/GST
 -
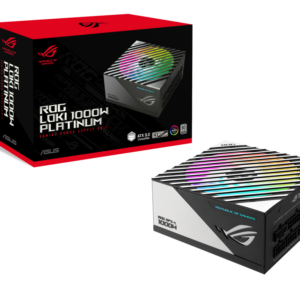
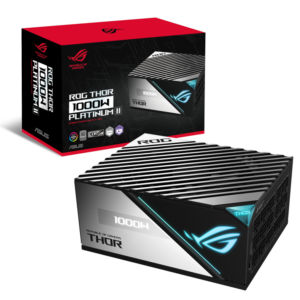 ASUS ROG THOR 1000W 80+ PLATINUM II OLED PSU (10Y)$579.00 w/GST
Preventing and Addressing Overheating
Next, we move on to overheating, another common cause of restarts. Ensure that your PC’s cooling system is working properly. Clean any dust from the fans and heatsinks. Good airflow is essential to keep temperatures down.
Moreover, consider upgrading your cooling solutions if necessary. This is especially important for gaming PCs. They generate a lot of heat during gameplay. Aftermarket coolers can provide better cooling performance.
Monitoring Temperatures with HWMonitor
To keep tabs on your system’s temperatures, you can use software tools like HWMonitor. Here’s how:
1. Download and Install HWMonitor: Visit the official website, download the software, and follow the installation instructions.
2. Open HWMonitor: Launch the application to start monitoring your system’s temperatures.
3. Check CPU and GPU Temperatures: Look for the readings related to your CPU and GPU. These are usually listed under their respective sections.
Safe Temperature Limits
Ensure that the temperatures are within safe limits:
– CPU: Safe temperatures usually range up to 70-80°C under load. However, this can vary depending on the make and model.
– GPU: Safe temperatures for GPUs are typically up to 80-85°C under load.
During Gaming Sessions
Especially during gaming sessions:
– Monitor Continuously: Keep HWMonitor running in the background to continuously monitor temperatures.
– Check for Spikes: Look out for sudden spikes in temperature. This could indicate a cooling issue.
– Take Action if Necessary: If temperatures consistently reach unsafe levels, you need to take action to prevent damage and restarts.
Updating Drivers and Software
Now, let’s focus on drivers and software. Outdated or corrupt drivers can lead to system instability. Ensure that all your drivers are up to date. Pay special attention to your graphics card drivers. They are crucial for gaming performance.
You can visit the manufacturer’s website to download the latest drivers. Alternatively, use driver update tools to automate the process. These tools can save you time and ensure that all drivers are up to date.
Checking your RAM
Furthermore, hardware issues can also cause restarts. Start by checking your RAM. Faulty RAM is a known culprit. Run a memory test to check for errors. If errors are found, consider replacing the faulty RAM modules.
Using Windows Memory Diagnostic Tool
Windows Memory Diagnostic is a tool built into Windows that can help identify and diagnose RAM issues. Here’s how to use it:
1. Access the Tool: Type “Windows Memory Diagnostic” in the Windows search bar and select the application.
2. Choose an Option: You can choose to restart your computer and check for problems immediately, or check the next time you restart your computer.
3. Running the Test: The tool will restart your computer and begin testing the RAM. This process may take some time, depending on the amount of RAM and the type of test being run.
4. Viewing the Results: Once the test is complete, your computer will restart. You can view the results by opening the Event Viewer, navigating to “Windows Logs” > “System”, and looking for an event from “MemoryDiagnostics-Results”.
Interpreting the Results
The results will let you know if any issues were detected:
– No Errors Found: If no errors are found, your RAM is likely in good condition.
– Errors Found: If errors are found, it indicates an issue with your RAM. You might need to replace the faulty RAM sticks.
Additional Steps
If errors are found:
– Identify the Faulty Stick: If you have multiple RAM sticks, you might need to test them one at a time to identify the faulty one.
– Check for Warranty: If your RAM is still under warranty, contact the manufacturer for a replacement.
-
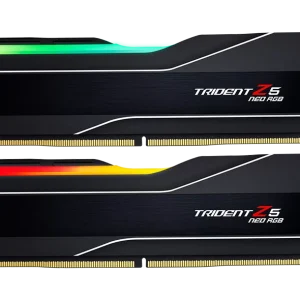 GSKILL TRIDENT Z5 NEO RGB AMD EXPO DDR5/32GB/6000MHz F5-6000J3238F16GX2-TZ5NR$225.00 w/GST
 -
 GSKILL TRIDENT Z RGB SERIES DDR4/32GB/3600MHz F4-3600C18D-32GTZR$139.00 w/GST
 -
 GSKILL RIPJAWS V SERIES DDR4/64GB/3600MHz F4-3600C18D-64GVK$223.00 w/GST
 -
Product on sale
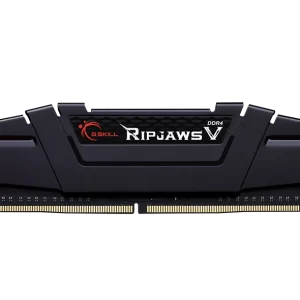 GSKILL RIPJAWS V SERIES DDR4/16GB/3600MHz F4-3600C18D-16GVKOriginal price was: $69.00.$65.00Current price is: $65.00. w/GST
In addition, check other hardware components like the motherboard and graphics card.
Look for any visible damage. If you suspect a hardware component is failing, consult with a professional. They can help identify and replace the faulty component.
Identifying Visible Damage
Visible damage to hardware components can be a clear indicator of potential issues. Here’s how you can inspect your system:
1. Power Off and Unplug: Ensure your PC is turned off and unplugged from the power source to ensure safety.
2. Open the Case: Carefully open the PC case to access the internal components.
3. Inspect Each Component: Look at each hardware component, including the motherboard, GPU, RAM, and PSU. Check for signs of damage such as burnt areas, broken parts, or anything that seems out of the ordinary.
4. Check the Connections: Ensure that all cables and components are securely connected. Loose connections can lead to instability.
Common Signs of Damage
Here are some common signs of damage to look out for:
1. Burnt Areas: On the motherboard or other components, which could indicate a short circuit or overheating.
2. Bulging or Leaking Capacitors: On the motherboard, which can lead to instability and failure.
3. Physical Damage: To the GPU or other expansion cards, which could impact their functionality.
4. Discoloration: On any of the components, which could be a sign of overheating.
Additional Tips
Besides the solutions mentioned above, here are some additional tips:
– Ensure that your system is not set to automatically restart upon system failure. You can find this setting in the System Properties under the Advanced tab.
– Keep your system and all software up to date. Software updates can fix known issues and improve system stability.
– Consider performing a clean boot. This can help identify if third-party software is causing the issue.
Troubleshooting and When to Seek Help
Troubleshooting is an essential skill for any gamer facing the issue of a gaming PC restart during gameplay. In this section, we’ll guide you through a checklist to pinpoint the problem. Additionally, we’ll discuss when it might be time to seek professional help.
Troubleshooting Checklist
Firstly, let’s start with a quick troubleshooting checklist. This list will help you identify common issues that might be causing the restarts.
1. Check the Event Viewer: Look for critical errors or warnings that occurred just before the restart.
2. Monitor Temperatures: Use software tools to check your CPU and GPU temperatures. Ensure they are within safe limits.
3. Test the Power Supply Unit (PSU): Ensure your PSU is providing sufficient power. Consider using a power supply tester.
4. Update Drivers and Software: Make sure all your drivers, especially the graphics card driver, are up to date.
5. Run a Memory Test: Check for errors in your RAM using Windows’ built-in memory diagnostic tool.
6. Check for Software Issues: If the issue occurs only with specific games, it might be a software-related issue.
7. Inspect Hardware Components: Look for visible damage on the motherboard, graphics card, and other components.
8. Ensure Proper Cooling: Clean dust from fans and heatsinks, and ensure good airflow inside the case.
When to Seek Professional Help
Furthermore, it’s important to know when to seek professional help. If you’ve gone through the checklist and the issue persists, it might be time to consult with a professional. Additionally, if you’re not comfortable performing certain checks, it’s better to seek help.
Professionals can provide a more in-depth diagnosis. They have the tools and expertise to identify and fix the issue. Moreover, they can help replace faulty components if necessary.
Preventive Measures
Preventing your gaming PC from restart during gameplay is crucial for a seamless experience. In this section, we’ll explore various preventive measures. These steps will help ensure your gaming sessions remain uninterrupted.
Maintaining Optimal Performance
Firstly, regular maintenance is key. Keep your PC clean and dust-free. Dust can clog up fans and heatsinks, leading to overheating. Ensure good airflow inside the case. This helps in maintaining optimal temperatures.
Cooling and Ventilation
Next, focus on cooling and ventilation. Invest in quality cooling solutions. This is particularly important for gaming PCs. They generate a lot of heat. Good cooling prevents overheating, a common cause of restarts.
Additionally, make sure your PC is in a well-ventilated area. Avoid placing it in enclosed spaces. Ensure there’s enough space around the PC for air to circulate. This helps in dissipating heat more effectively.
Software Updates
Now, let’s talk about software updates. Keep your operating system and all drivers up to date. Software updates often include fixes for known issues. They can improve system stability and performance.
Moreover, update your games and other software regularly. Developers release patches to fix bugs and improve performance. Staying updated ensures you have the latest fixes and improvements.
Safe Gaming Practices
Furthermore, adopt safe gaming practices. Avoid overclocking unless you’re certain your cooling solutions can handle it. Overclocking generates additional heat. This can lead to overheating and restarts.
In addition, monitor your system’s temperatures during gaming sessions. Use software tools to keep an eye on CPU and GPU temperatures. Ensure they remain within safe limits.
Regular Check-Ups
Besides these measures, perform regular check-ups on your hardware. Check the PSU to ensure it’s providing sufficient power. Test the RAM for errors. Ensure all hardware components are functioning properly.
Conclusion: Take Control of Your Gaming Experience
In conclusion, dealing with a gaming PC that restarts during gameplay can be frustrating, but with the right knowledge and tools, you can take control and fix the issue. We’ve covered a comprehensive range of solutions, from understanding the problem to implementing fixes and preventive measures. Remember, a stable gaming experience is within reach.
Ready to Build Your Dream Gaming PC?
If you’re looking to build a gaming PC that matches your specific needs and preferences, look no further than Volta PC. Our team of experts is ready to help you assemble a machine that delivers top-notch performance and reliability. Contact Volta PC today to start building your dream gaming setup.
Need Help Fixing Gaming PC Restarts?
If you’re experiencing restarts during gameplay and need professional assistance, Volta PC Upgrade & Repair is here for you. We specialize in diagnosing and fixing gaming PCs, ensuring you get back to your games with minimal downtime. Get in touch with Volta PC Upgrade & Repair now for a comprehensive upgrade and repair service tailored to your gaming needs.
Take the first step towards uninterrupted gaming today with Volta PC!